Culinary Advisor
A cooking platform built around craft, culture, and the stories behind what we eat.
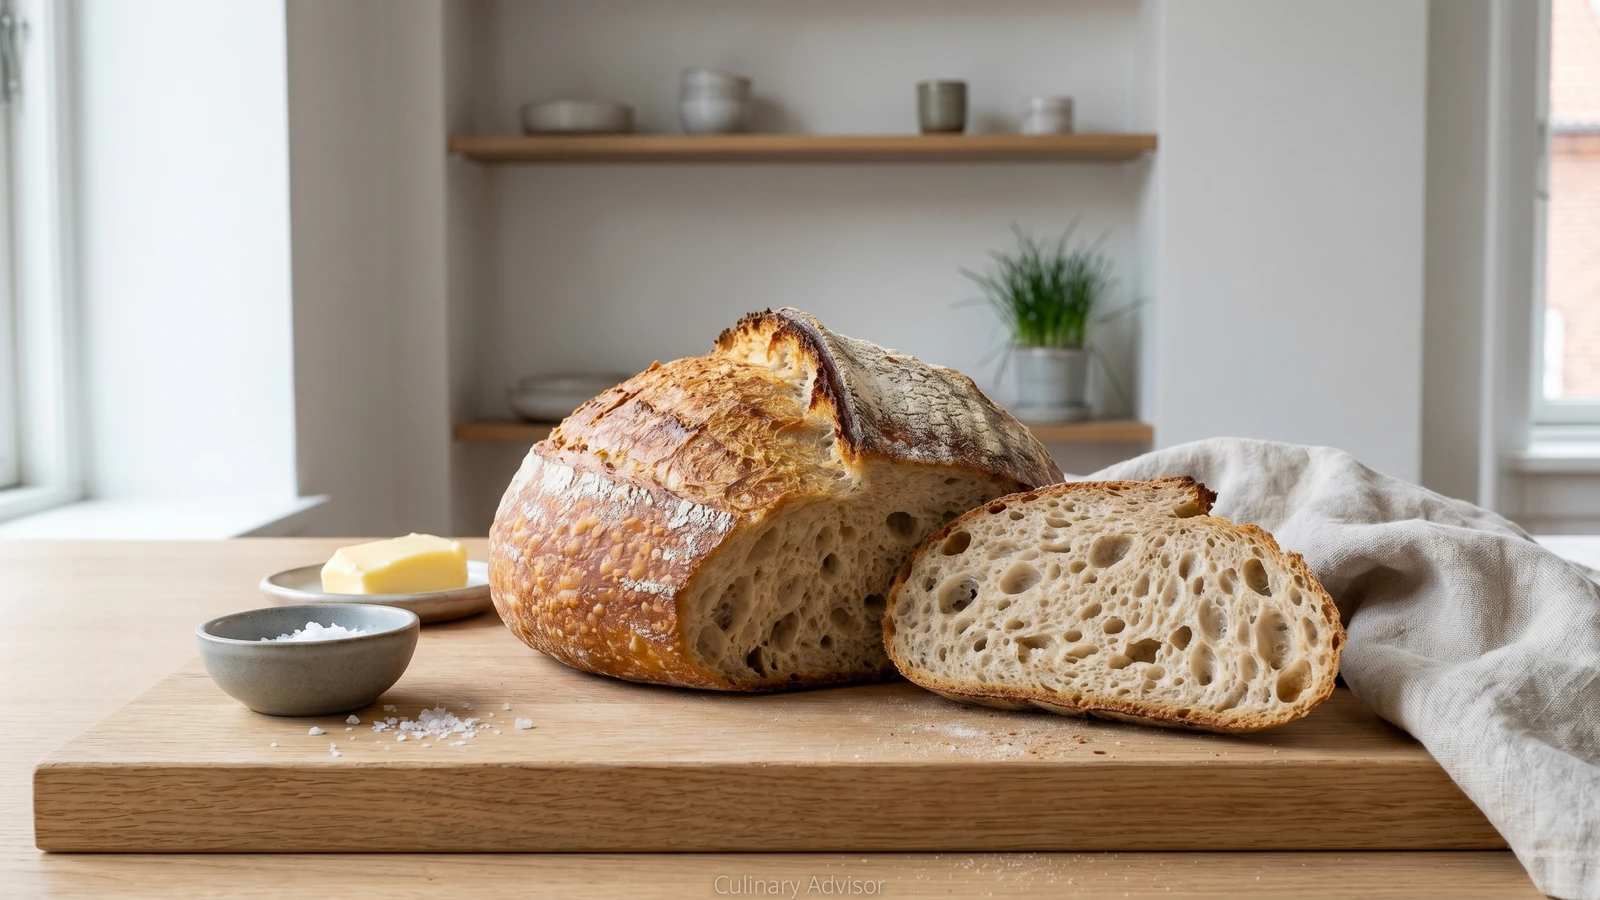
Surdejsbrod
Created by Chef Freja
A slow-risen Danish wheat sourdough with a blistered crust and a tender, open crumb. The hearth loaf you slice thick and set in the centre of the table when the soup is ready and the people you love are on their way.
The soups come back in October, and when they do, you need bread. Not rugbrod, though rugbrod has its place at every Danish table. This is the other bread: the wheat loaf with a wild starter and a crust that crackles when you press it. Surdejsbrod is what you slice thick and set in the middle of the table when friends come for faellesspisning, the shared meal that is the heart of how Danes eat together.
This is a slow bread. You mix it one morning, fold it through the afternoon, shape it in the evening, and bake it the next day. The time is not yours to spend. It belongs to the starter, the living culture of yeast and bacteria that does its quiet work while you sleep. What you give is attention at a few key moments: the folds that build strength in the dough, the shaping that gives the loaf its surface tension, the single score that lets it open in the oven's heat. None of it is difficult. All of it matters.
Pay attention to the dough's feel under your hands. After the folds, it should be smooth, alive, holding air. When you tip it onto the counter to shape, it will spread gently but not collapse. If it collapses, it needed more time. If it barely moves, it needed less. You'll learn this. Every sourdough baker does, and it comes faster than you think. By the second or third loaf, your hands will know before your head does. That's when it becomes yours.
Denmark's sourdough tradition stretches deep into the medieval period, when every household kept a living starter for their rugbrod. Wheat sourdough loaves occupied a different place in Danish life: they were the bread of celebration and hospitality, the lighter companion to the dense rye that sustained daily meals. Through the twentieth century, commercial yeast nearly replaced wild starters in Danish wheat baking, and the craft survived mainly in small bakeries on the islands and in Jutland. The revival of surdejsbrod in Danish home kitchens over the past two decades reflects a return to slow fermentation and a recognition that the best bread is made with time, not from a packet.
The technique, the tradition, and the story behind every dish.
Discover Culinary AdvisorIngredients
active wheat sourdough starter
Quantity
100g
fed 8 to 12 hours before, at peak activity
strong white bread flour
Quantity
450g
stone-ground whole wheat flour
Quantity
50g
water
Quantity
350g
at room temperature
fine sea salt
Quantity
10g
rice flour
Quantity
for dusting the proving basket
| Ingredient | Quantity |
|---|---|
| active wheat sourdough starterfed 8 to 12 hours before, at peak activity | 100g |
| strong white bread flour | 450g |
| stone-ground whole wheat flour | 50g |
| waterat room temperature | 350g |
| fine sea salt | 10g |
| rice flour | for dusting the proving basket |
Equipment Needed
- •Large mixing bowl
- •Bench scraper
- •Round proving basket (banneton), approximately 22cm
- •Dutch oven or heavy lidded pot, 24cm to 26cm
- •Razor blade or bread lame
- •Wire cooling rack
- •Kitchen scale
Instructions
- 1
Rest the flour and water
Combine the bread flour and whole wheat flour in a large bowl. Add the water and mix with your hands until no dry flour remains. The dough will be shaggy and rough. That's fine. Cover the bowl and let it rest for forty-five minutes to an hour. This rest is called the autolyse, and it does something essential: the flour absorbs the water fully and the gluten begins to develop on its own, without any kneading from you. When you come back, the dough will feel smoother and more willing under your hands.
Use a kitchen scale, not measuring cups. Bread baking is one of the few places in the kitchen where precision matters more than instinct. Ten grams of extra flour changes the crumb. - 2
Add the starter and salt
Scatter the active sourdough starter in small pieces over the surface of the rested dough, then sprinkle the salt on top. With wet hands, squeeze and fold the starter and salt through the dough until everything is fully incorporated, about three to four minutes. The dough will feel loose and ragged at first, almost as though it's coming apart. Keep working it. By the end it should feel cohesive, slightly tacky, and alive under your fingers. If the starter hasn't been absorbed, keep folding. You'll know when it's right.
Your starter is ready when it has doubled in size, is domed on top, and smells pleasantly sour, like yogurt and ripe fruit. If it has collapsed or smells sharply of acetone, feed it again and wait. - 3
Stretch and fold
Over the next four hours, perform four sets of stretch-and-folds, one set roughly every forty-five minutes to an hour. For each set, wet your hand, slide it under one side of the dough, stretch it upward, and fold it over the centre. Turn the bowl a quarter turn and repeat. Four stretches per set, four sets total. Each set takes less than a minute. Between sets, cover the bowl and leave the dough alone at room temperature. These folds are doing the work that kneading does in other breads: building gluten structure, trapping the gas the starter produces, giving the loaf its architecture. After the final fold, leave the dough undisturbed for one to two hours more. By the end of this bulk fermentation, the dough should have grown by roughly half its original volume. The surface will be smooth, slightly domed, and dotted with small bubbles. That's the sign that the starter has done its work.
The dough tells you more than the clock does. If your kitchen is warm, fermentation will be faster. If cool, slower. Watch the dough, not the time. A fifty percent rise with visible bubbles is what you're after. - 4
Pre-shape the dough
Tip the dough gently onto a clean, unfloured counter. Using a bench scraper, fold the edges underneath to form a rough round. Don't worry about perfection. This is just the first shaping, a way of organizing the dough and beginning to build tension on its surface. Leave it uncovered on the counter for twenty minutes. This rest lets the gluten relax so you can give it a final shape without the dough fighting you.
- 5
Shape and cold proof
Dust a round proving basket generously with rice flour. Rice flour won't absorb into the dough the way wheat flour does, so the loaf releases cleanly the next morning. Flip the rested dough over so the smooth side faces down. Pull the far edge toward the centre, then the near edge, then each side, building tension with each fold. Flip it seam-side down and use the bench scraper to drag it gently toward you in short, firm movements, tightening the surface as you go. You'll feel the dough grip the counter and resist. That tension is what holds the loaf's shape in the oven. Place it seam-side up in the proving basket, cover with a damp cloth or a plastic bag, and put it straight into the fridge. Let it proof overnight, twelve to sixteen hours. The cold slows the fermentation and deepens the flavor, giving the bread a gentle, complex sourness that a warm proof can never match. This is the joy of waiting.
If the dough feels slack and won't hold its shape, let it rest five minutes more, then try again. The dough should feel taut, like a filled cushion. Not tight like a drum. Somewhere in between. - 6
Score and bake the loaf
The next morning, place a Dutch oven or heavy lidded pot in the oven and heat to 250C for at least forty-five minutes. The pot must be thoroughly, searingly hot. Take the dough from the fridge and turn it out onto a piece of parchment paper, seam-side down. Don't let it come to room temperature first. Cold dough scores more cleanly and holds its shape better in the first fierce minutes of baking. Score the top with a razor blade or the sharpest knife you have: one decisive cut at a slight angle, about a centimetre deep. Don't hesitate. A confident score opens cleanly; a timid one drags and seals. Lower the dough carefully into the hot pot using the parchment as a sling. Cover with the lid and bake for twenty-five minutes. The lid traps the moisture escaping from the dough and creates steam, which is what gives the crust its blisters and its dark, lacquered shine. Remove the lid, lower the oven to 230C, and bake for another fifteen to twenty minutes until the crust is deep golden brown, almost mahogany in the darkest places. Lift the loaf out and tap the bottom. It should sound hollow, like knocking on a wooden door. Set it on a wire rack and leave it alone. This is the hardest part. Cutting into hot bread compresses the crumb and releases the moisture that should stay inside. Wait at least an hour. Two is better. The bread is still baking as it cools.
If you don't have a Dutch oven, place a deep roasting tray on the shelf below and pour boiling water into it as you load the bread. It creates less steam than a closed pot, but it works.
Chef Tips
- •Your starter is everything. Feed it the night before with equal parts flour and water by weight, and use it the next morning when it's at its peak: doubled, domed, and fragrant. A sluggish starter makes a flat, dense loaf. There are no shortcuts here.
- •The small amount of whole wheat flour is deliberate. It gives the crumb a warmer color and a deeper, slightly nutty flavor without making the bread heavy. Stone-ground is best because the bran is coarser and adds a texture you can feel when you chew.
- •Don't chase the open crumb you see in photographs. A good surdejsbrod has an even, tender crumb with some irregular holes, not a web of enormous caverns. This loaf should hold butter. It should soak up soup without falling apart. That's the point of a table bread.
- •Store it cut-side down on a wooden board, uncovered, for two to three days. The crust protects the crumb better than any bag. After the third day, slice and toast it. Toasted sourdough with butter and flaky salt is one of the quiet pleasures of a Danish kitchen.
Advance Preparation
- •Feed your sourdough starter eight to twelve hours before you plan to mix the dough. If you're mixing in the morning, feed it the night before and leave it at room temperature overnight.
- •The cold proof is forgiving. Twelve hours is the minimum, sixteen is comfortable, and the dough can stay in the fridge for up to twenty hours if life gets in the way. The flavor only deepens with time.
- •The baked loaf freezes well. Cool it completely, wrap it tightly in cloth and then plastic, and freeze for up to two months. Thaw at room temperature and refresh in a hot oven for five minutes to revive the crust.
Frequently Asked Questions
Nutrition Information
1 serving (about 105g)
Where cooking meets culture.
Culinary mentorship, cultural storytelling, and the editorial depth that makes cooking meaningful.
Explore Culinary Advisor