Culinary Advisor
A cooking platform built around craft, culture, and the stories behind what we eat.
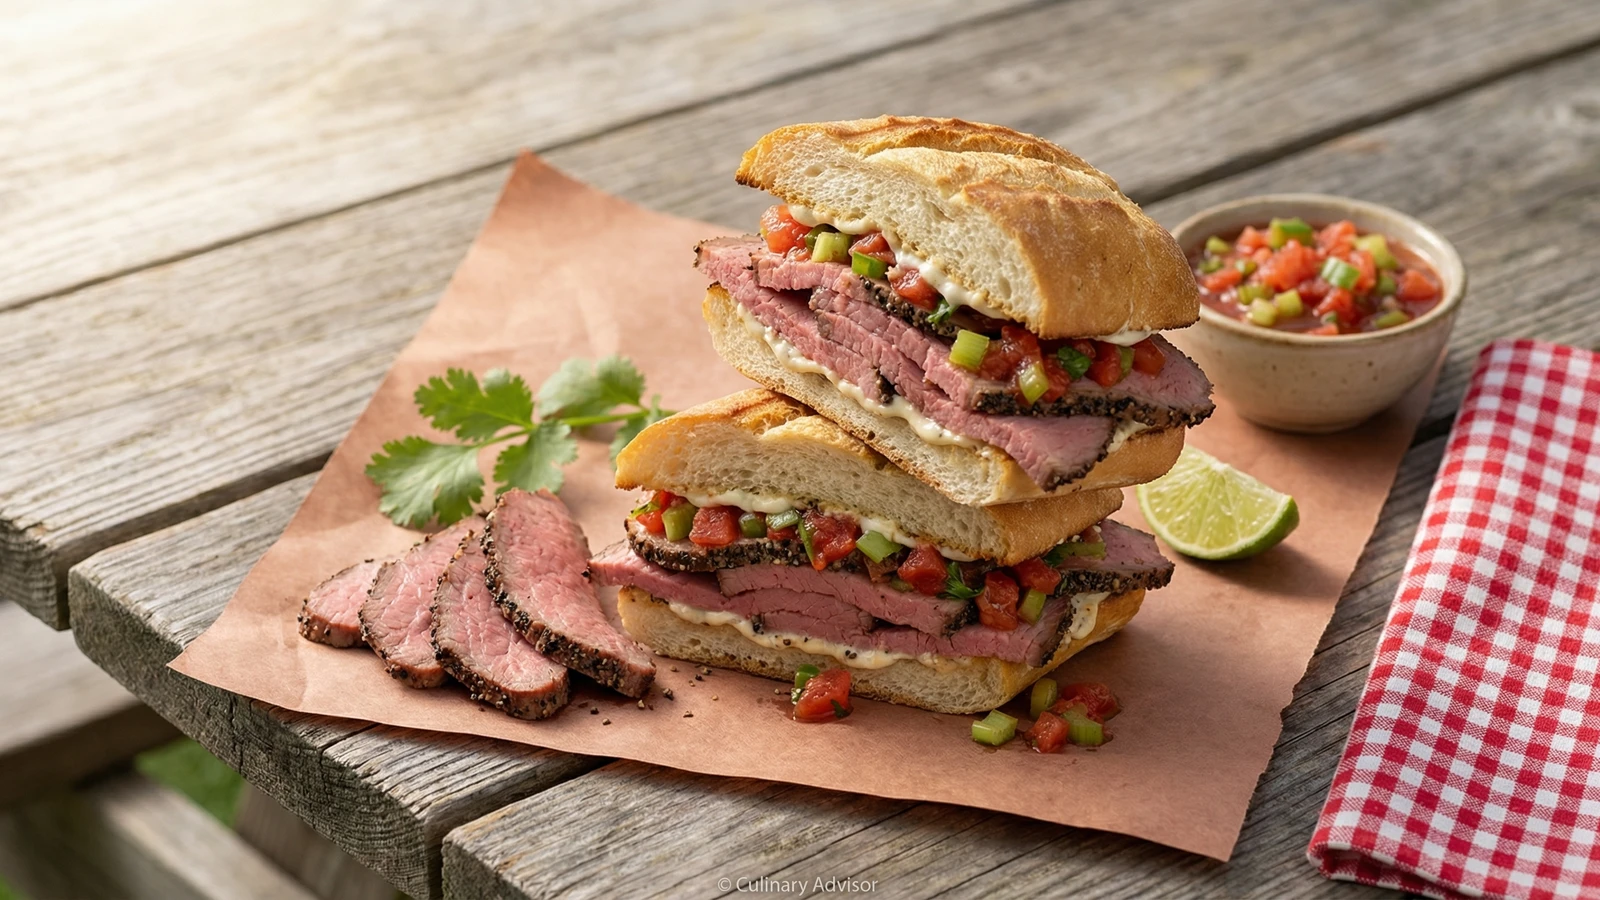
Santa Maria Tri-Tip Sandwich
Created by
California's Central Coast gift to American barbecue: pepper-crusted tri-tip grilled over red oak, carved against the grain and stacked on a crusty roll with bright tomato salsa and roasted garlic aioli. This is the sandwich that feeds rodeos and ranches from Paso Robles to Santa Barbara.
The Santa Maria Valley gave American barbecue something the rest of the country never quite understood: restraint. While other regions pile on sauces and rubs with eighteen ingredients, the ranchers of California's Central Coast season their beef with garlic, salt, pepper, and fire. That's it. The meat speaks for itself.
Tri-tip was considered a throwaway cut until the 1950s, when Santa Maria butchers started grilling it whole over red oak coals for community fundraisers. They discovered what happens when you apply high heat to a triangular muscle from the bottom sirloin: a crust forms while the interior stays rosy and juicy. Sliced thin against the grain, the meat becomes tender enough to pile on bread without requiring a steak knife.
The sandwich came later, a practical evolution for feeding crowds at rodeos and oak-pit barbecues. A crusty roll, some fresh salsa, maybe a swipe of garlic aioli. Nothing more. The tri-tip does the talking.
I've eaten these sandwiches at roadside stands from San Luis Obispo to Lompoc, watched pit masters tend their oak fires through the morning, and I can tell you the secret isn't complicated. Good beef, proper heat, and the confidence to leave well enough alone. You can make this at home. Your grill won't be a genuine Santa Maria pit, but the results will honor the tradition.
The technique, the tradition, and the story behind every dish.
Discover Culinary AdvisorIngredients
tri-tip roast
Quantity
1 (2 1/2 to 3 pounds)
trimmed of silver skin
garlic salt
Quantity
2 tablespoons
coarsely ground black pepper
Quantity
1 tablespoon
dried parsley flakes
Quantity
1 teaspoon
vegetable oil
Quantity
2 tablespoons
ripe Roma tomatoes
Quantity
1 pound
seeded and diced
white onion
Quantity
1/2 medium
finely diced
celery stalks
Quantity
2
finely diced
jalapeño pepper
Quantity
1
seeded and minced
fresh cilantro
Quantity
1/4 cup
roughly chopped
fresh lime juice
Quantity
2 tablespoons
Worcestershire sauce
Quantity
1 teaspoon
kosher salt (for salsa)
Quantity
1/2 teaspoon, plus more to taste
mayonnaise
Quantity
1 cup
garlic cloves
Quantity
4
minced and mashed to a paste
fresh lemon juice
Quantity
1 tablespoon
kosher salt (for aioli)
Quantity
1/4 teaspoon
crusty French rolls or Dutch crunch rolls
Quantity
6
unsalted butter
Quantity
2 tablespoons
softened
| Ingredient | Quantity |
|---|---|
| tri-tip roasttrimmed of silver skin | 1 (2 1/2 to 3 pounds) |
| garlic salt | 2 tablespoons |
| coarsely ground black pepper | 1 tablespoon |
| dried parsley flakes | 1 teaspoon |
| vegetable oil | 2 tablespoons |
| ripe Roma tomatoesseeded and diced | 1 pound |
| white onionfinely diced | 1/2 medium |
| celery stalksfinely diced | 2 |
| jalapeño pepperseeded and minced | 1 |
| fresh cilantroroughly chopped | 1/4 cup |
| fresh lime juice | 2 tablespoons |
| Worcestershire sauce | 1 teaspoon |
| kosher salt (for salsa) | 1/2 teaspoon, plus more to taste |
| mayonnaise | 1 cup |
| garlic clovesminced and mashed to a paste | 4 |
| fresh lemon juice | 1 tablespoon |
| kosher salt (for aioli) | 1/4 teaspoon |
| crusty French rolls or Dutch crunch rolls | 6 |
| unsalted buttersoftened | 2 tablespoons |
Equipment Needed
- •Charcoal or gas grill
- •Chimney starter (for charcoal)
- •Instant-read thermometer
- •Sharp carving knife
- •Large cutting board
Instructions
- 1
Season the tri-tip
Remove the tri-tip from refrigeration one hour before cooking. Pat it thoroughly dry with paper towels. Combine the garlic salt, black pepper, and dried parsley in a small bowl. Rub the meat lightly with vegetable oil, then apply the seasoning generously on all sides, pressing it into the surface. The rub should coat the meat completely but not form a thick paste. Set aside at room temperature while you prepare your fire.
Traditional Santa Maria seasoning contains just garlic salt and pepper. The parsley adds visual appeal and a subtle herbal note without betraying the spirit of simplicity. - 2
Make the Santa Maria salsa
Combine the diced tomatoes, white onion, celery, jalapeño, and cilantro in a medium bowl. The celery is essential here, a quirk of Santa Maria tradition that sets this salsa apart from standard pico de gallo. Add the lime juice, Worcestershire sauce, and salt. Stir gently to combine. Taste and adjust seasoning. Cover and refrigerate for at least thirty minutes to let flavors meld. The salsa improves over several hours but should be used within two days.
Seeding the tomatoes prevents the salsa from becoming watery. Squeeze each tomato half gently over a bowl, using your finger to dislodge the seeds and jelly. - 3
Prepare the garlic aioli
Mince the garlic cloves finely, then sprinkle with a pinch of kosher salt. Using the flat side of your knife, mash and drag the garlic against your cutting board until it forms a smooth paste. Transfer to a small bowl, add the mayonnaise, lemon juice, and salt. Whisk until completely smooth. The aioli should taste assertively of garlic with a bright lemon finish. Cover and refrigerate until needed.
- 4
Build your fire
For charcoal grills, light a full chimney of coals. When ash-gray and glowing, bank them to one side to create a hot zone and a cooler zone. If using red oak chunks or chips, add them directly to the coals now. For gas grills, preheat one side to high heat, around 450 to 500 degrees, leaving the other side off. Close the lid and let the grates get properly hot for ten minutes.
Red oak is the authentic Santa Maria wood. If unavailable, white oak works well. Hickory is too strong and will overpower the beef's natural flavor. - 5
Grill the tri-tip
Place the tri-tip directly over the hot coals, fat cap facing up. Sear for five to six minutes without moving until a dark crust forms. Flip and sear the second side another five minutes. You'll hear aggressive sizzling. This is the sound of the Maillard reaction building flavor. Move the meat to the cooler side of the grill, close the lid, and continue cooking until an instant-read thermometer registers 125 degrees for medium-rare or 130 for medium, another fifteen to twenty minutes depending on thickness. The tri-tip's triangular shape means the thin end will be more done than the thick end. This is a feature, not a flaw. Different doneness for different preferences.
- 6
Rest the meat properly
Transfer the tri-tip to a cutting board and tent loosely with foil. Rest for at least ten minutes, fifteen is better. During this time, the internal temperature will rise another five degrees and the juices will redistribute throughout the muscle. Cut into a rested steak and the juices stay in the meat. Cut too soon and they pool on your board, leaving you with dry slices. Patience rewards.
Save any juices that accumulate on the cutting board. Drizzle them over the sliced meat or use them to moisten the bottom of each roll. - 7
Slice against the grain
Locate the direction of the muscle fibers. They run differently in different parts of the tri-tip, so look carefully. Slice perpendicular to these fibers, cutting against the grain in thin slices, about a quarter-inch thick. This shortens the muscle fibers and makes each bite tender. Slicing with the grain produces chewy, stringy meat no matter how well you cooked it. Take your time here. Proper slicing is the difference between a great sandwich and a jaw workout.
- 8
Toast the rolls
Split the rolls horizontally, leaving a hinge intact if you prefer. Spread the cut sides lightly with softened butter. Place cut-side down on the grill or in a hot cast iron skillet for one to two minutes until golden and slightly crisp. The toasting creates a barrier against the juices, preventing soggy bread while adding flavor. Don't skip this step.
- 9
Assemble the sandwiches
Spread garlic aioli generously on the top half of each toasted roll. Pile four to five slices of tri-tip on the bottom half, arranging them in overlapping layers. The meat should mound slightly above the bread line. Spoon two to three tablespoons of salsa directly onto the meat. The tomatoes should nestle into the folds of the beef, their brightness cutting through the richness. Close the sandwich gently. Press down just enough to compact it slightly without crushing the bread. Serve immediately while the meat is still warm.
Chef Tips
- •Ask your butcher for a tri-tip with the fat cap still attached. This layer bastes the meat during cooking and can be trimmed away after slicing if anyone objects to it. Most supermarket tri-tips come already trimmed, which is a shame.
- •The thin end of the tri-tip will reach medium-well while the thick end stays medium-rare. Embrace this variation. When assembling sandwiches, offer guests their preference.
- •Dutch crunch rolls, with their crackled rice-flour topping, are the true Central Coast choice. If unavailable, look for crusty French rolls with substantial crust and tender crumb. Soft hamburger buns are a betrayal.
- •For transporting to a picnic or tailgate, slice the tri-tip and hold it in a foil-lined cooler for up to an hour. Pack the salsa, aioli, and toasted rolls separately. Assemble on site. Never assemble sandwiches more than ten minutes before eating if you value the bread.
- •A proper Santa Maria meal includes pinquito beans, tiny pink beans cooked with bacon and tomatoes. They're traditional on the plate, though not in the sandwich itself. Seek them out if authenticity matters to you.
Advance Preparation
- •The salsa can be made up to two days ahead and refrigerated. Its flavor improves after several hours.
- •The garlic aioli keeps refrigerated for up to one week. The garlic flavor intensifies over time.
- •The tri-tip can be seasoned up to twelve hours before cooking. Refrigerate uncovered on a rack set over a sheet pan. This dry-brining draws out moisture, concentrates flavor, and promotes better crust formation.
- •Cooked tri-tip can be held warm, wrapped in foil and towels in a cooler, for up to one hour before slicing. This is the caterer's trick for serving a crowd.
Frequently Asked Questions
Nutrition Information
1 serving (about 850g)
Where cooking meets culture.
Culinary mentorship, cultural storytelling, and the editorial depth that makes cooking meaningful.
Explore Culinary Advisor