Culinary Advisor
A cooking platform built around craft, culture, and the stories behind what we eat.
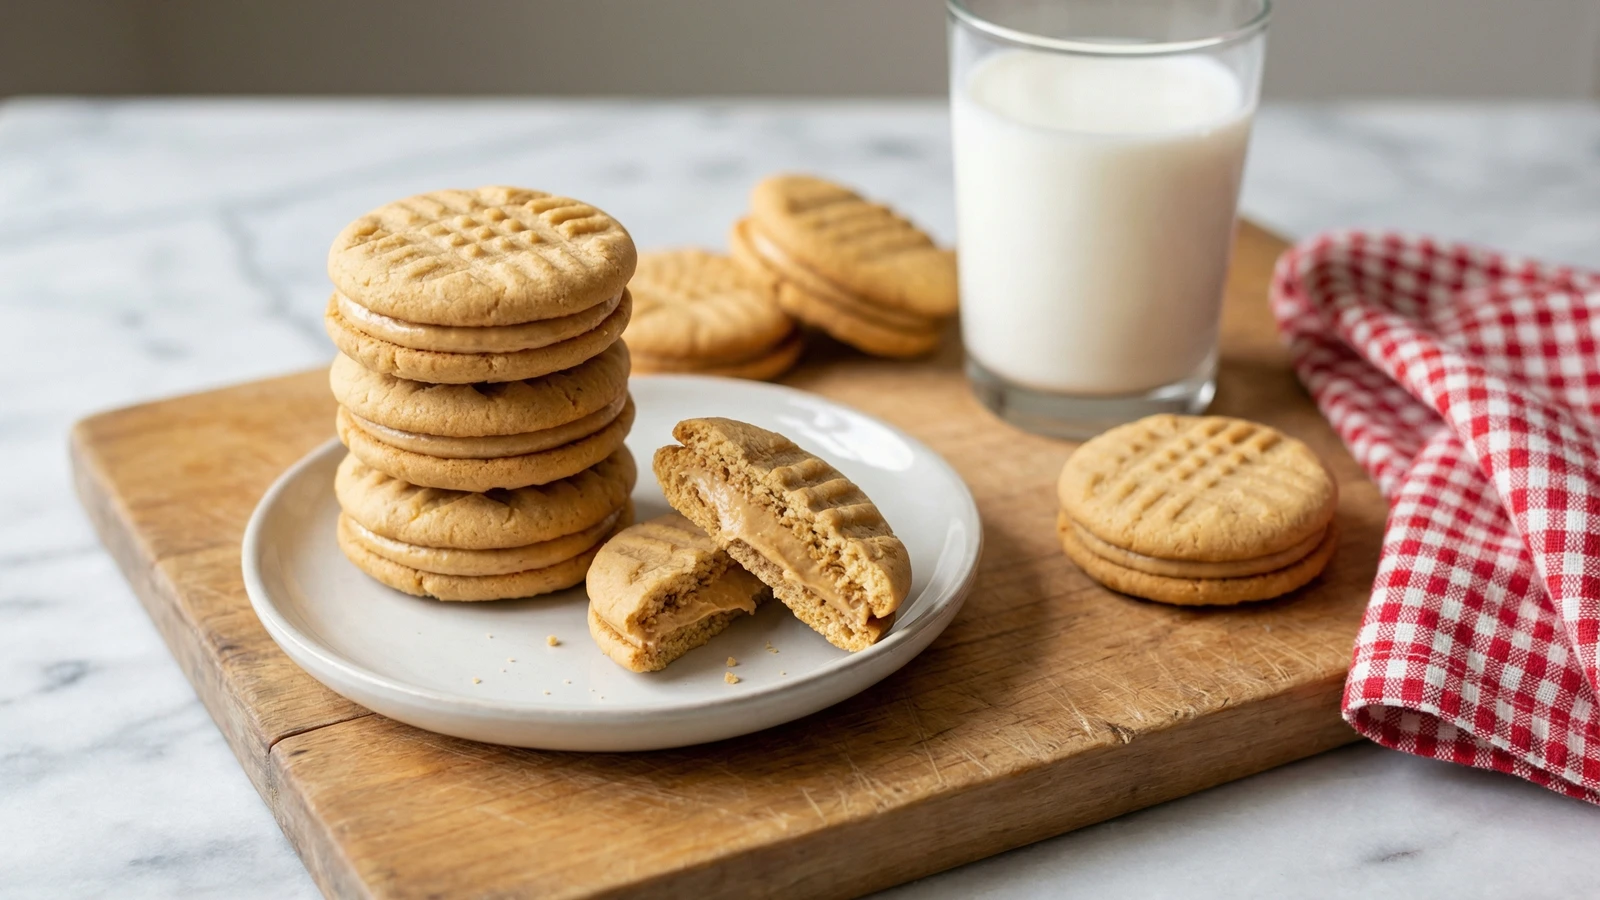
Peanut Butter Sandwich Cookies
Created by
Two fork-pressed peanut butter cookies embracing a cloud of peanut butter buttercream. This is the cookie jar classic that disappears first at every potluck, and the recipe you'll be asked to share.
Peanut butter cookies entered the American repertoire around 1916, shortly after peanut butter became a pantry staple. That iconic crosshatch pattern? It started as a practical solution. The dense dough needed help flattening in the oven, and pressing with fork tines did the job while creating a signature look. Function became tradition.
Sandwiching two of these cookies around a peanut butter filling is gilding the lily in the best possible way. The cookie itself is tender, just slightly crumbly, with that roasted nuttiness that comes only from real peanut butter. The filling adds richness and structure, transforming a humble cookie into something that feels like a proper confection.
I've tested this recipe with every style of peanut butter available. Natural peanut butter, the kind with oil pooling on top, produces a more delicate cookie with pure peanut flavor. Commercial peanut butter with stabilizers gives you a sturdier cookie that holds its shape better. Both work. Use what you have, and use what you love.
These cookies freeze beautifully, which makes them ideal for baking ahead. The assembled sandwiches actually improve after a day, as the filling softens the cookies slightly and the flavors meld together. Make a double batch. You'll need it.
The technique, the tradition, and the story behind every dish.
Discover Culinary AdvisorIngredients
creamy peanut butter
Quantity
1 cup
unsalted butter
Quantity
1/2 cup
softened
granulated sugar
Quantity
1/2 cup
light brown sugar
Quantity
1/2 cup
packed
large egg
Quantity
1
vanilla extract
Quantity
1 teaspoon
all-purpose flour
Quantity
1 1/2 cups
baking soda
Quantity
1 teaspoon
fine sea salt
Quantity
1/2 teaspoon
creamy peanut butter
Quantity
3/4 cup
for filling
unsalted butter
Quantity
4 tablespoons
softened, for filling
powdered sugar
Quantity
1 1/2 cups
sifted
heavy cream
Quantity
2 tablespoons
vanilla extract
Quantity
1/2 teaspoon
for filling
fine sea salt
Quantity
pinch
for filling
| Ingredient | Quantity |
|---|---|
| creamy peanut butter | 1 cup |
| unsalted buttersoftened | 1/2 cup |
| granulated sugar | 1/2 cup |
| light brown sugarpacked | 1/2 cup |
| large egg | 1 |
| vanilla extract | 1 teaspoon |
| all-purpose flour | 1 1/2 cups |
| baking soda | 1 teaspoon |
| fine sea salt | 1/2 teaspoon |
| creamy peanut butterfor filling | 3/4 cup |
| unsalted buttersoftened, for filling | 4 tablespoons |
| powdered sugarsifted | 1 1/2 cups |
| heavy cream | 2 tablespoons |
| vanilla extractfor filling | 1/2 teaspoon |
| fine sea saltfor filling | pinch |
Equipment Needed
- •Stand mixer or hand mixer
- •Two rimmed baking sheets
- •Parchment paper
- •Wire cooling rack
- •Fork for crosshatch pattern
- •Small offset spatula or butter knife
Instructions
- 1
Cream the fats and sugars
In a large bowl, beat the peanut butter and softened butter together until completely smooth and unified, about 2 minutes with a hand mixer or stand mixer. Add both sugars and beat until light and fluffy, another 3 minutes. The mixture should look pale and hold soft peaks when you lift the beater. This aeration gives your cookies their tender texture.
Truly softened butter is crucial here. It should give easily when pressed but not be greasy or melted. Leave it out for 45 minutes before starting. - 2
Add wet ingredients
Beat in the egg until fully incorporated, scraping down the bowl once. Add the vanilla and mix briefly. The batter will look glossy and smooth, with no streaks of egg visible.
- 3
Mix the dry ingredients
In a separate bowl, whisk together the flour, baking soda, and salt. This takes thirty seconds and ensures even distribution of leavening throughout your dough. Skipping this step means some cookies puff while others spread flat.
- 4
Combine and chill
Add the flour mixture to the peanut butter mixture and stir with a wooden spoon or spatula until just combined. The dough will be thick and slightly oily to the touch. Cover the bowl tightly and refrigerate for at least 1 hour, or up to 3 days. Cold dough holds its shape in the oven and produces thicker, more tender cookies.
If using natural peanut butter, your dough may be softer. Chill for the full hour regardless of how it looks. - 5
Preheat and prepare
Position racks in the upper and lower thirds of your oven and preheat to 350°F. Line two baking sheets with parchment paper. Remove dough from the refrigerator.
- 6
Shape the cookies
Roll the dough into balls slightly smaller than a golf ball, about 1 tablespoon each. You need 48 cookies for 24 sandwiches, so work methodically. Place them 2 inches apart on the prepared sheets. Using a fork dipped in flour, press a crosshatch pattern into each ball, flattening them to about 1/2-inch thick. The tines should sink nearly to the pan.
Dip your fork in flour between every few cookies to prevent sticking. If the dough clings, your fork is too warm. Rinse it under cold water and dry before continuing. - 7
Bake until just set
Bake for 10 to 12 minutes, rotating the pans from top to bottom and front to back at the halfway point. The cookies are done when the edges look set and the tops no longer appear wet, but the centers still look slightly underdone. They will firm as they cool. Remove from oven when they're lighter than you think they should be.
- 8
Cool completely
Let cookies rest on the baking sheet for 5 minutes, then transfer to a wire rack to cool completely. This takes at least 30 minutes. Filling warm cookies creates a melted mess that seeps out the sides. Patience here rewards you with clean, professional-looking sandwiches.
- 9
Make the filling
While cookies cool, beat the peanut butter and butter for the filling until smooth and creamy, about 2 minutes. Add the sifted powdered sugar in three additions, beating well after each. The mixture will look dry at first, then come together. Add the cream, vanilla, and pinch of salt. Beat on medium-high for 2 minutes until the filling is light and fluffy, almost like frosting.
Sifting the powdered sugar prevents lumps that no amount of beating will remove. Take the thirty seconds to do it properly. - 10
Assemble the sandwiches
Match cookies into pairs of similar size. Turn half of them bottom-side up. Using a small offset spatula or butter knife, spread about 1 tablespoon of filling onto each upturned cookie, leaving a small border around the edge. The filling will spread when you press the top cookie on. Place the matching cookie on top, bottom-side down, and press gently until the filling just reaches the edges.
- 11
Rest before serving
For the best texture, let the assembled sandwiches rest at room temperature for 30 minutes before serving. This allows the filling to set slightly and the flavors to marry. The cookies will soften just enough to bite through cleanly without the filling squeezing out.
Chef Tips
- •Match your peanut butter style to your preference. Commercial brands like Skippy or Jif create sturdy cookies with a sweeter, more familiar flavor. Natural peanut butter produces a more delicate cookie with pure roasted peanut taste. Both are correct choices.
- •For gift giving, these cookies travel beautifully. Stack them in a single layer in a tin with parchment between layers. They'll hold for a week at room temperature without the filling weeping.
- •Add 1/2 cup of mini chocolate chips to the filling for a chocolate-peanut butter version that children and adults fight over equally.
- •If your kitchen runs warm, refrigerate the filling for 15 minutes before assembling. It pipes more cleanly when slightly chilled.
Advance Preparation
- •Cookie dough can be refrigerated for up to 3 days before baking. Well-wrapped, it also freezes for up to 2 months. Thaw overnight in the refrigerator before shaping.
- •Unfilled baked cookies keep in an airtight container at room temperature for 5 days, or frozen for 2 months.
- •Assembled sandwich cookies improve after resting overnight. Store in a single layer in an airtight container at room temperature for up to 5 days.
- •Assembled sandwiches freeze beautifully for up to 2 months. Thaw at room temperature for 1 hour before serving. The filling softens the cookies slightly, making them even more tender.
Frequently Asked Questions
Nutrition Information
1 serving (about 27g)
Where cooking meets culture.
Culinary mentorship, cultural storytelling, and the editorial depth that makes cooking meaningful.
Explore Culinary Advisor