Culinary Advisor
A cooking platform built around craft, culture, and the stories behind what we eat.
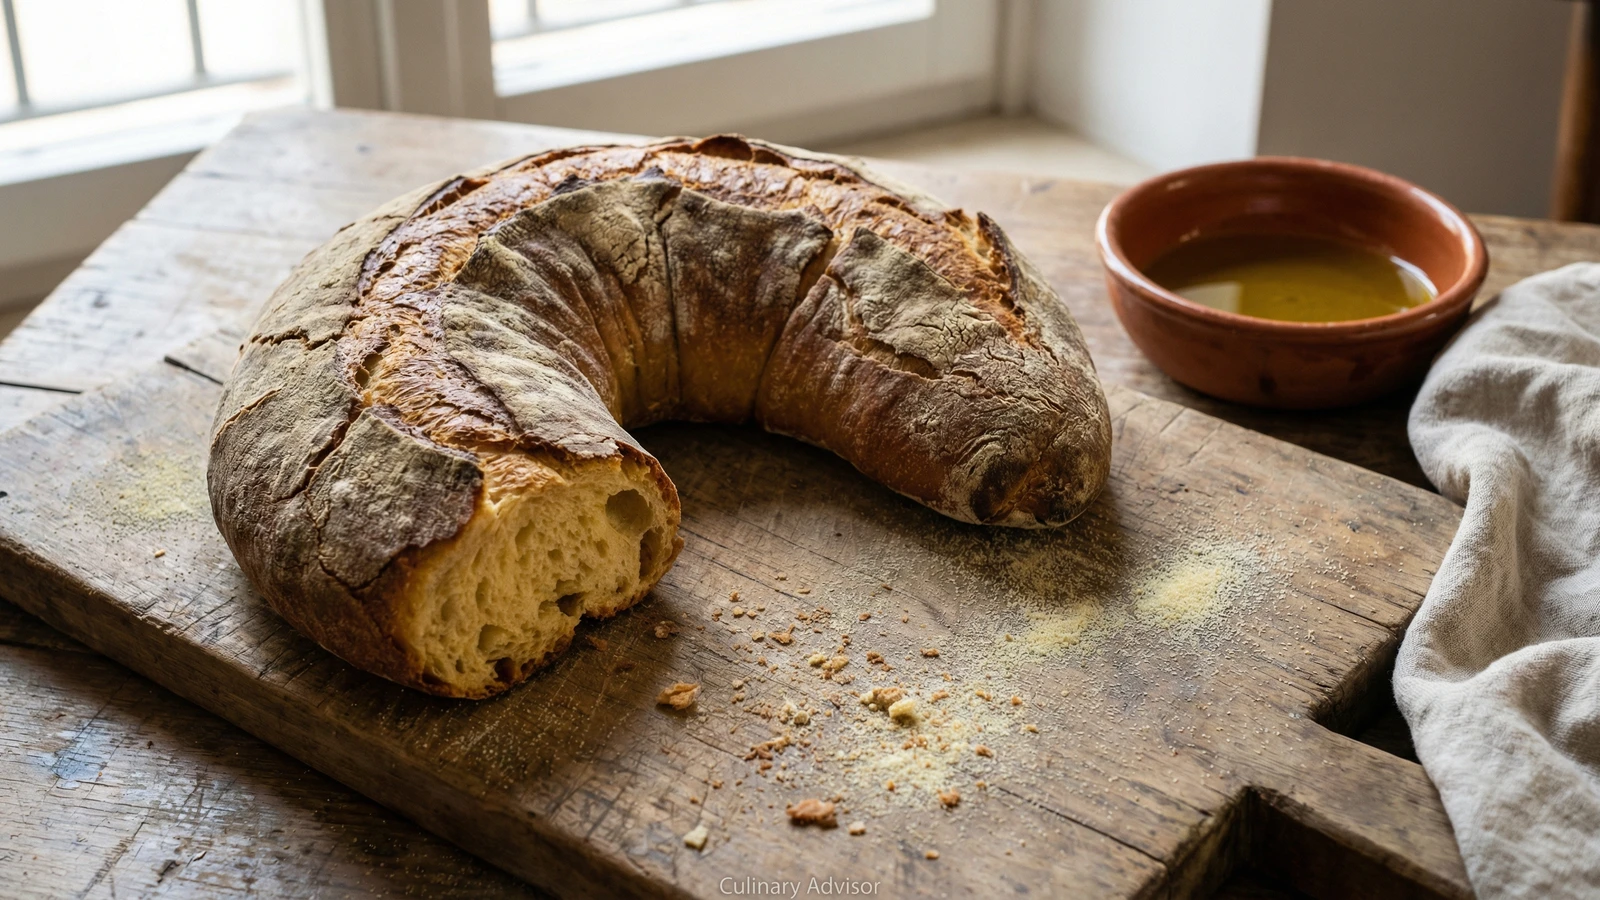
Pane di Matera IGP
Created by Chef Graziella
The horn-shaped bread of Basilicata, made from durum wheat semolina and natural leavening, baked until the crust cracks like ancient stone. A bread meant to last, because in the south, bread was too precious to waste.
In Matera, bread is not merely food. It is architecture. The loaves emerge from the oven shaped like horns or crescents, their crusts thick and cracked like the tufa stone of the Sassi, the ancient cave dwellings carved into the hillsides where this bread has been baked for millennia.
Pane di Matera is made from durum wheat semolina, the hard wheat of the south that gives the crumb its golden color and the loaf its remarkable keeping quality. Nine days this bread stays fresh. Nine days. This was not accident but necessity. In the impoverished villages of Basilicata, families baked once a week or less. The bread had to last.
The natural leavening, what Italians call lievito madre, gives the bread its complex flavor and helps preserve it. You cannot rush this process. The dough ferments slowly, developing the acids that extend shelf life and the flavor that makes this bread worth the effort. If you want bread in two hours, buy it from a bakery. If you want to understand what bread meant to generations of southern Italians, make this.
Matera's bread-making tradition stretches back over three thousand years, documented in archaeological findings of ancient grain mills and communal ovens carved into the rock. The IGP designation, granted in 2008, protects a bread that sustained one of Europe's oldest continuously inhabited settlements, where communal ovens in the Sassi served neighborhoods of families who marked their loaves with wooden stamps to identify them after baking.
The technique, the tradition, and the story behind every dish.
Discover Culinary AdvisorIngredients
active sourdough starter
Quantity
200 grams
100% hydration, fed with durum wheat
semola rimacinata
Quantity
800 grams
bread flour
Quantity
200 grams
water
Quantity
650 grams
at room temperature
fine sea salt
Quantity
20 grams
| Ingredient | Quantity |
|---|---|
| active sourdough starter100% hydration, fed with durum wheat | 200 grams |
| semola rimacinata | 800 grams |
| bread flour | 200 grams |
| waterat room temperature | 650 grams |
| fine sea salt | 20 grams |
Equipment Needed
- •Large mixing bowl
- •Bench scraper
- •Proofing baskets or linen couche
- •Baking stone or steel
- •Cast iron pan for steam
- •Peel or rimless baking sheet
- •Instant-read thermometer
- •Wire cooling rack
Instructions
- 1
Prepare your starter
Your sourdough starter must be active and vigorous, doubled in size within 4 to 6 hours of feeding. If you have been maintaining a starter with regular flour, feed it with durum wheat semolina for at least three feedings before making this bread. The character of the grain matters. A sluggish starter produces a dense, sour loaf that no amount of technique can save.
To test readiness, drop a small spoonful of starter into water. If it floats, proceed. If it sinks, feed it again and wait. - 2
Mix the dough
Combine the semola rimacinata and bread flour in a large bowl. Make a well in the center. Add 600 grams of the water and the sourdough starter. Mix with your hand, incorporating the flour from the edges until you have a shaggy mass. The dough will feel different from regular bread dough. Durum wheat is thirsty and stubborn. Let it rest, covered, for 30 minutes. This autolyse allows the flour to hydrate fully.
- 3
Add salt and develop the dough
Dissolve the salt in the remaining 50 grams of water. Add this to the dough, squeezing and folding to incorporate. The dough will feel slippery at first, then come together. Turn it onto a clean surface and knead for 10 to 12 minutes. Work with purpose. The dough should become smooth, elastic, and slightly tacky. It will never feel like soft wheat dough. Accept this.
Durum wheat develops gluten differently. The dough will resist you. Keep working. When you can stretch a small piece thin enough to see light through without tearing, you are finished. - 4
Bulk fermentation
Place the dough in a lightly oiled container large enough to allow it to triple. Cover and let ferment at room temperature, about 20 to 22 degrees Celsius, for 5 to 6 hours. Every 90 minutes during the first 4 hours, perform a set of stretch and folds: wet your hand, grab one side of the dough, stretch it up, and fold it over the center. Rotate the container and repeat three more times. The dough will become progressively airier and more billowy.
- 5
Cold retard
After the bulk fermentation, cover the container tightly and refrigerate for 12 to 18 hours. This slow, cold fermentation develops the complex flavor and the acids that give Pane di Matera its keeping quality. Do not skip this step. The bread will be adequate without it. Adequate is not what you are after.
- 6
Divide and preshape
Remove the dough from the refrigerator. It will have expanded further and smell pleasantly sour. Turn it onto a lightly floured surface and divide into two equal pieces, approximately 850 grams each. Gently preshape each piece into a round by pulling the edges toward the center, then flipping it smooth side up. Let rest uncovered for 30 minutes.
- 7
Shape the cornetto
The traditional shape of Pane di Matera is the cornetto, a crescent or horn. Flour your work surface lightly. Take one preshaped round and flatten it gently into an oval. Fold the top third down and the bottom third up, like a letter. Seal the seam. Roll the dough into a cylinder about 35 centimeters long, keeping the center thicker than the ends. Curve it into a crescent, with the thicker center forming the back of the curve and the tapered ends pointing forward. Place seam side up in a heavily floured couche or lined basket. Repeat with the second loaf.
The shape is not merely decorative. The crescent creates more crust relative to crumb, and the varied thickness ensures a range of textures in each slice. - 8
Final proof
Cover the shaped loaves and let proof at room temperature for 2 to 3 hours. The dough should increase by roughly half and feel pillowy when gently pressed. A finger indent should spring back slowly but not completely. If your kitchen is cool, this may take longer. If warm, watch carefully. Overproofed dough bakes flat.
- 9
Prepare the oven
One hour before baking, place a baking stone or steel on the middle rack and a cast iron pan on the rack below. Heat the oven to 260 degrees Celsius (500 degrees Fahrenheit). The stone must be thoroughly heated. A bread baked on an inadequately heated stone will not rise properly and will stick.
- 10
Bake with steam
Gently turn one loaf onto a peel or parchment paper, seam side down. The crescent shape needs no scoring; the natural expansion creates the characteristic cracks. Slide the loaf onto the hot stone. Pour one cup of hot water into the cast iron pan below and immediately close the oven door. The steam is essential for crust development. Bake for 20 minutes with steam.
Work quickly when loading. Every second the oven door is open, you lose heat and steam. Have everything ready before you begin. - 11
Finish baking
After 20 minutes, carefully remove the cast iron pan or crack the oven door briefly to release the steam. Reduce heat to 220 degrees Celsius (425 degrees Fahrenheit). Continue baking for 35 to 40 minutes more. The crust should be deeply browned, almost mahogany, and the loaf should sound hollow when tapped on the bottom. Internal temperature should reach 95 degrees Celsius (205 degrees Fahrenheit). Repeat with the second loaf.
- 12
Cool completely
Place the baked loaves on a wire rack. Do not cut into them for at least two hours, preferably four. The crumb continues to set as the bread cools. Cutting too early releases steam and leaves you with a gummy interior. Patience. This bread has taken you more than a day to make. Give it two more hours.
Chef Tips
- •Semola rimacinata is essential. It is durum wheat semolina that has been milled twice, producing a finer texture than regular semolina. Do not substitute regular semolina or the dough will be gritty. Italian grocers and online sources carry it.
- •The thick crust of Pane di Matera is a feature, not a flaw. It protects the soft interior and allows the bread to stay fresh for days. Store the cooled loaf cut side down on a wooden board, covered with a clean cloth. Do not use plastic, which traps moisture and softens the crust.
- •Traditional bakers in Matera used wood-fired ovens that reached extreme temperatures and retained heat for the long bake. A baking stone or steel and the steam technique approximate this at home. The results will not be identical. Accept this and proceed.
- •This bread improves on the second day. The flavors meld and the crumb becomes easier to slice. By day three, it is at its peak. By day nine, it is still edible, though best toasted or used for friselle.
Advance Preparation
- •The sourdough starter must be fed with durum wheat semolina for at least three feedings before beginning, which takes 2 to 3 days if you are converting an existing starter.
- •The cold retard stage can be extended up to 24 hours if needed, allowing you to bake at a convenient time the following day.
- •Baked loaves keep at room temperature for 7 to 9 days when stored properly. They freeze well for up to two months; thaw at room temperature and refresh briefly in a hot oven.
Frequently Asked Questions
Nutrition Information
1 serving (about 80g)
Where cooking meets culture.
Culinary mentorship, cultural storytelling, and the editorial depth that makes cooking meaningful.
Explore Culinary Advisor