Culinary Advisor
A cooking platform built around craft, culture, and the stories behind what we eat.
Paaskelam: Lammekoelle med Hvidlog og Rosmarin
Created by Chef Freja
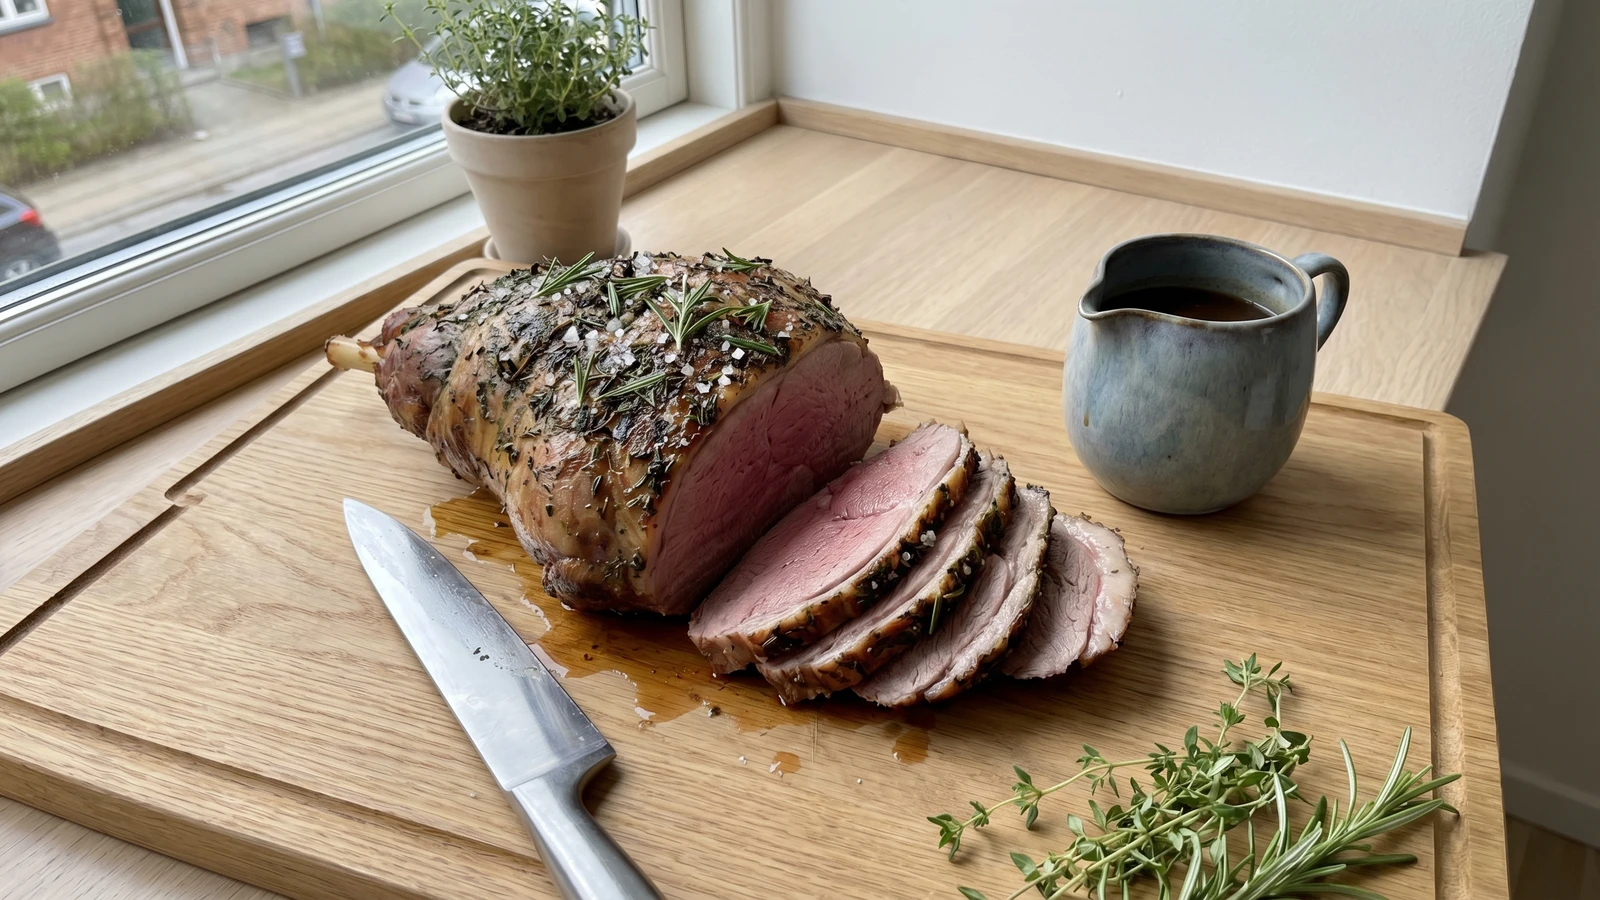
The Easter centerpiece of the Danish table: a whole leg of spring lamb studded with garlic slivers, rubbed with rosemary and thyme, slow-roasted until rosa at the bone, and carved in thick slices for the family to share.
Easter arrives in Denmark with a shift you feel before you see it. The days stretch. The light turns from grey to something warmer, almost golden in the late afternoon. Crocuses push through in the parks, and in kitchen windows across Copenhagen, the first branches of forsythia appear in glass vases. This is when the lamb comes out.
Paaskelam is the centerpiece of the Danish Easter table, the meal that gathers the family after the long, dark months of winter. A whole lammekoelle, a bone-in leg of lamb, studded with slivers of garlic, rubbed with rosemary and thyme, and roasted slowly until the meat is rosa at the bone: pink, tender, full of juice. It's not complicated food. It's generous food, cooked with love, meant to be carved at the table and shared with people you've missed. Where flaeskesteg belongs to juleaften and mortensgaas to November, paaskelam belongs to this moment, the first real feast of spring.
Two things will make or break this roast. First, the garlic. You'll cut small incisions across the surface and push slivers deep into the flesh, so the flavor reaches the meat from within, not just from the crust. Second, the resting. When the lamb comes out of the oven, you let it rest for a full twenty minutes under foil. This is not optional. Resting allows the juices, which the heat has driven to the center of the meat, to redistribute back through the whole leg. Cut too soon and those juices run out onto the board. Wait, and they stay in every slice. You'll know when it's right.
Lamb has been part of the Danish Easter since at least the 1800s, when the tradition of paaskelam merged Christian symbolism with the practical calendar of Danish farming: spring was when the first lambs of the year were ready for the table. For much of the 20th century, lamb was far less common than pork in Danish daily cooking, and paaskelam was one of the few occasions when it took center stage. The Danish preference for cooking lamb rosa, pink at the bone rather than well-done, is a relatively recent shift, influenced by French technique that gained ground in Danish home kitchens from the 1970s onward and transformed how a generation thought about roasting meat.
The technique, the tradition, and the story behind every dish.
Discover Culinary AdvisorIngredients
bone-in leg of lamb (lammekoelle)
Quantity
1, about 2.5 kg
garlic
Quantity
8 cloves
peeled, sliced into thin slivers
fresh rosemary
Quantity
4 sprigs
leaves stripped and roughly chopped
fresh thyme
Quantity
8 sprigs
leaves stripped
cold-pressed rapeseed oil
Quantity
2 tablespoons
coarse sea salt
Quantity
2 tablespoons
black pepper
Quantity
1 tablespoon
freshly cracked
dry white wine
Quantity
200ml
lamb or chicken stock
Quantity
500ml
cold unsalted butter
Quantity
20g
fine sea salt
Quantity
to taste
| Ingredient | Quantity |
|---|---|
| bone-in leg of lamb (lammekoelle) | 1, about 2.5 kg |
| garlicpeeled, sliced into thin slivers | 8 cloves |
| fresh rosemaryleaves stripped and roughly chopped | 4 sprigs |
| fresh thymeleaves stripped | 8 sprigs |
| cold-pressed rapeseed oil | 2 tablespoons |
| coarse sea salt | 2 tablespoons |
| black pepperfreshly cracked | 1 tablespoon |
| dry white wine | 200ml |
| lamb or chicken stock | 500ml |
| cold unsalted butter | 20g |
| fine sea salt | to taste |
Equipment Needed
- •Large roasting tin with a rack
- •Meat thermometer, probe or instant-read
- •Small sharp paring knife for studding
- •Carving knife and large cutting board
- •Fine-mesh sieve for the gravy
Instructions
- 1
Temper the lamb
Take the lamb out of the fridge two hours before you plan to roast it. Set it on the counter, loosely covered with a clean cloth. A cold leg of lamb straight from the fridge cooks unevenly: the outside dries out and tightens before the center has time to warm through. Two hours at room temperature means the heat can travel evenly from the surface to the bone, and you'll get that consistent rosa from edge to center that makes this roast what it is.
If your kitchen is very warm, one and a half hours is enough. You're not trying to bring the meat to room temperature completely, just taking the deep chill off. - 2
Stud with garlic
Peel the garlic cloves and slice each one lengthwise into three or four thin slivers. Using a small sharp paring knife, make deep incisions across the surface of the lamb, about three centimeters apart, angled slightly so the garlic can slide in. Push a sliver of garlic into each cut and press it in until it sits below the surface. This matters more than rubbing garlic on the outside. Surface garlic burns at high heat and turns bitter. Garlic buried in the meat melts slowly as the lamb roasts, releasing its flavor into the flesh from within. You won't see it on the finished roast, but you'll taste it in every slice.
Make the incisions following the natural grain of the meat. When you carve later, the garlic slivers will sit between the slices rather than falling out. - 3
Season and rub
Combine the chopped rosemary, thyme leaves, rapeseed oil, coarse sea salt, and cracked black pepper in a small bowl and mix into a rough paste. Rub this across the entire surface of the lamb with your hands, working it into every fold, into the crevice around the bone, across the underside. Don't be timid. The leg is large and the flavor needs to be everywhere. Coarse salt is important here. Fine salt dissolves too quickly on the surface and doesn't create the same crust during roasting. The coarse grains hold their shape through the initial blast of heat and form a savory, herbed crust that seals the surface and gives each slice its edge of salt and rosemary.
- 4
Sear at high heat
Heat the oven to 220°C. Set the lamb on a rack inside a large roasting tin, with the fattiest side facing up. Put it in the oven and roast for twenty minutes. This initial blast of high heat does one essential thing: it builds the crust. The browning of proteins and sugars on the surface creates flavor compounds that a slow oven alone never produces. After twenty minutes the surface should be deep golden brown and the kitchen should smell of rosemary and roasting meat. If it's still pale, give it five more minutes.
Position the rack in the lower third of the oven. The top of the lamb should sit roughly in the center, where the heat is most even. - 5
Slow-roast until rosa
Reduce the oven to 160°C without opening the door more than necessary. Continue roasting until the internal temperature at the thickest part of the leg reads 55 to 58°C on your meat thermometer. For a 2.5 kg leg, this will take roughly one hour to one hour and fifteen minutes, but every oven and every piece of meat is different. Trust the thermometer, not the clock. At 55°C the lamb will be deeply rosa at the bone, still blushing and yielding. At 58°C it will be rosa with a warmer, softer pink. Beyond 62°C you've lost the quality that makes spring lamb worth waiting for. The season decides what's on the table. The thermometer decides when it's ready.
Insert the thermometer into the thickest part of the meat, making sure the tip doesn't touch the bone. Bone conducts heat differently and gives a false reading that will lead you to pull the lamb too soon. - 6
Rest the lamb
Lift the lamb off the rack and transfer it to a warm cutting board. Cover it loosely with foil and let it rest for twenty minutes. This is not patience for its own sake. During roasting, the intense heat drives the juices toward the center of the meat, away from the surface. Resting allows those juices to redistribute evenly back through the whole leg. If you carve too soon, the juices pool on the board and every slice is drier than it should be. After twenty minutes, the internal temperature will have risen another three or four degrees from residual heat, and the juices will stay in the meat where they belong. Leave the roasting tin with its drippings on the hob. You need those for the gravy.
- 7
Make the gravy
Set the roasting tin over medium heat on the hob. Pour off all but a tablespoon of fat. Add the white wine and stir vigorously with a wooden spoon, scraping up every dark, caramelized bit stuck to the bottom and sides of the tin. Those fragments are concentrated flavor, the best part of the roast dissolved in the pan. Let the wine bubble and reduce by half, then pour in the stock. Simmer for ten to twelve minutes until the gravy has thinned slightly from its initial reduction but still coats the back of a spoon. Strain through a fine sieve into a warm jug, pressing the solids. Return the strained gravy to the tin, bring it back to a gentle simmer, and stir in the cold butter. The butter gives the brun sovs a glossy finish and rounds out the sharpness of the wine. Season with fine sea salt and pepper. Taste it. Adjust.
If your stock is good and well-made from bones and time, the natural gelatin will give the gravy all the body it needs. No flour required. - 8
Carve and serve
Carve the lamb in thick slices, cutting at an angle toward the bone and across the grain. Lay the slices on a warm serving platter, overlapping slightly so the rosa center of each piece is visible. Pour any resting juices from the board into the gravy jug. Bring the platter to the table with the gravy alongside, new spring potatoes if the season has given them to you, and whatever green thing has arrived at the market. This is paaskelam. This is how we greet each other when spring finally arrives. Tak for mad.
Chef Tips
- •A meat thermometer is the only reliable way to guarantee rosa. Guessing by time alone is a gamble with an expensive piece of meat and a table full of people waiting. Insert a probe thermometer before the lamb goes in the oven so you can monitor without opening the door.
- •If you can find Danish spring lamb from a local butcher, that is the best version of this dish. The meat is smaller, sweeter, and more delicate than imported lamb from larger breeds. The season decides, and spring lamb in season is worth seeking out.
- •Don't throw away the bone after carving. Put it in a pot with water, an onion, a carrot, and a few peppercorns, and simmer for three or four hours. You'll have the beginning of next week's soup, and you'll have earned it.
- •Rapeseed oil is the traditional Danish cooking fat and has a clean, slightly nutty flavor that works beautifully with lamb. Olive oil is fine if that's what you have, but rapeseed is what a Danish kitchen reaches for.
Advance Preparation
- •The lamb can be studded with garlic and rubbed with the herb paste the evening before. Cover loosely and refrigerate overnight. The flavors deepen as they sit. Bring to room temperature two hours before roasting.
- •The gravy can be made slightly ahead and kept warm in a jug set in a pan of hot water. Stir in the butter just before serving so it keeps its gloss.
- •Leftover lamb is beautiful the next day, sliced cold and laid on rugbrod with remoulade and thinly sliced pickled cucumber. An Easter Monday smorrebrod worth planning for.
Frequently Asked Questions
Nutrition Information
1 serving (about 260g)
Where cooking meets culture.
Culinary mentorship, cultural storytelling, and the editorial depth that makes cooking meaningful.
Explore Culinary Advisor