Culinary Advisor
A cooking platform built around craft, culture, and the stories behind what we eat.
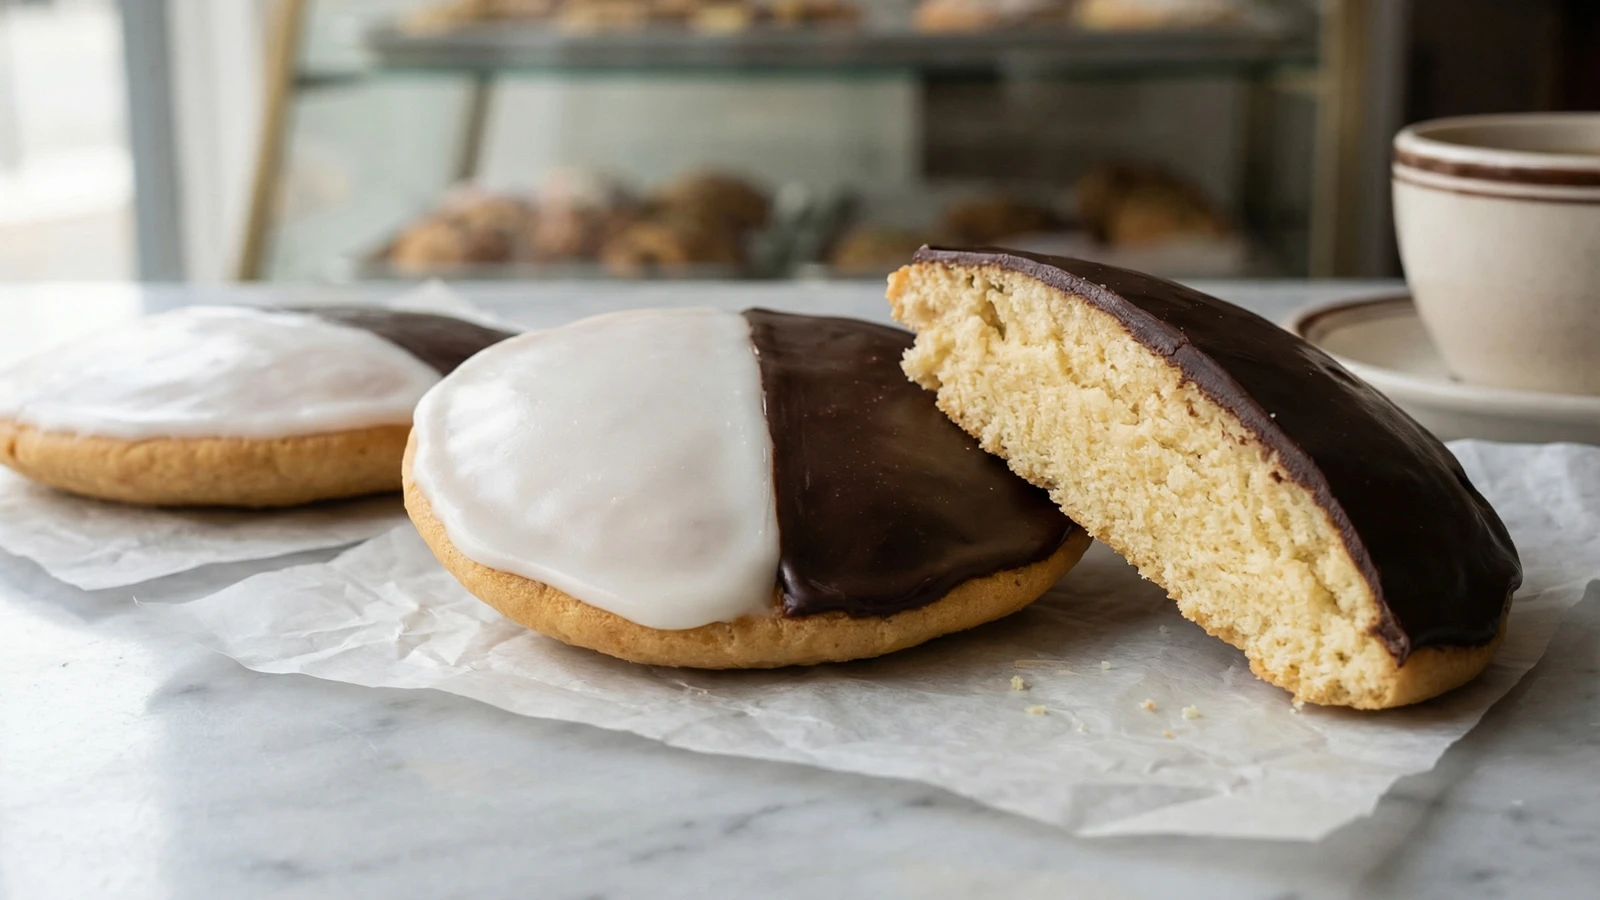
New York Black and White Cookies
Created by
Soft, cakey cookies cloaked in glossy vanilla and chocolate fondant icing, straight from the glass cases of New York's legendary Jewish bakeries. This is the cookie that taught a city to find common ground.
Every New York deli worth its pastrami has these cookies stacked behind glass. Soft as a muffin top, glossy as patent leather, split down the middle between vanilla and chocolate. They arrived with German and Jewish immigrants in the early 1900s and never left. The black and white became as essential to the city's identity as the subway or the attitude.
These aren't cookies in the chewy, crisp-edged American tradition. They're closer to small cakes, tender and springy, designed to support that thick layer of fondant icing without breaking apart. The base must be moist enough to eat alone but sturdy enough to hold its own under the weight of that two-tone glaze. Get the balance right and you'll understand why Seinfeld devoted an entire episode to their symbolism.
The icing is fondant in the old-fashioned sense: powdered sugar, corn syrup, and a splash of vanilla, cooked to a precise consistency that sets with a shine but never turns brittle. The chocolate half gets cocoa and a touch more liquid. Apply them side by side while the cookies are still slightly warm, and they'll set up with that characteristic matte-to-glossy finish that marks the real thing.
I've watched these cookies bring together strangers at deli counters across the five boroughs. There's something honest about their half-and-half philosophy. They don't pretend to be one thing or another. They are, unapologetically, both.
The technique, the tradition, and the story behind every dish.
Discover Culinary AdvisorIngredients
all-purpose flour
Quantity
2 1/4 cups (280g)
baking powder
Quantity
1/2 teaspoon
fine sea salt
Quantity
1/4 teaspoon
unsalted butter
Quantity
1/2 cup (1 stick)
softened
granulated sugar
Quantity
1 cup (200g)
large eggs
Quantity
2
room temperature
whole milk
Quantity
1/2 cup
room temperature
sour cream
Quantity
1/2 cup
room temperature
pure vanilla extract
Quantity
1 teaspoon
almond extract
Quantity
1/4 teaspoon
powdered sugar
Quantity
4 cups (480g)
sifted
light corn syrup
Quantity
1/3 cup
pure vanilla extract
Quantity
2 teaspoons
for icing
hot water
Quantity
3-4 tablespoons
divided
Dutch-process cocoa powder
Quantity
3 tablespoons
| Ingredient | Quantity |
|---|---|
| all-purpose flour | 2 1/4 cups (280g) |
| baking powder | 1/2 teaspoon |
| fine sea salt | 1/4 teaspoon |
| unsalted buttersoftened | 1/2 cup (1 stick) |
| granulated sugar | 1 cup (200g) |
| large eggsroom temperature | 2 |
| whole milkroom temperature | 1/2 cup |
| sour creamroom temperature | 1/2 cup |
| pure vanilla extract | 1 teaspoon |
| almond extract | 1/4 teaspoon |
| powdered sugarsifted | 4 cups (480g) |
| light corn syrup | 1/3 cup |
| pure vanilla extractfor icing | 2 teaspoons |
| hot waterdivided | 3-4 tablespoons |
| Dutch-process cocoa powder | 3 tablespoons |
Equipment Needed
- •Stand mixer or hand mixer
- •Two rimmed baking sheets
- •Parchment paper
- •1/4 cup measure or large cookie scoop
- •Wire cooling rack
- •Small offset spatula or butter knife
- •Fine-mesh sieve for sifting
Instructions
- 1
Prepare dry ingredients
Whisk together the flour, baking powder, and salt in a medium bowl. Set aside. Preheat your oven to 350°F and line two baking sheets with parchment paper. These cookies spread, so you'll want room between them.
- 2
Cream butter and sugar
In a stand mixer fitted with the paddle attachment (or using a hand mixer), beat the softened butter and sugar on medium-high speed until pale and fluffy, about 3 minutes. The mixture should look almost white and feel light when you scrape the bowl. This aeration creates the cookie's signature tender crumb.
Truly softened butter leaves a slight indent when pressed but doesn't feel greasy. Cold butter won't cream properly; melted butter creates dense cookies. - 3
Add eggs and wet ingredients
Add the eggs one at a time, beating well after each addition. Scrape down the bowl. Mix in the milk, sour cream, vanilla extract, and almond extract until just combined. The batter may look slightly curdled at this stage. That's normal and will smooth out when you add the flour.
- 4
Incorporate flour
With the mixer on low speed, gradually add the flour mixture. Mix only until the flour disappears. The batter will be thick and sticky, closer to muffin batter than typical cookie dough. Do not overmix or the cookies will turn tough. Stop the moment you see no more dry streaks.
- 5
Portion the batter
Using a 1/4 cup measure or large cookie scoop, drop mounds of batter onto the prepared baking sheets, spacing them 3 inches apart. You'll fit about 4 per standard sheet. Use the back of a spoon dipped in water to gently spread each mound into a round about 3 inches across and 1/2 inch thick. Don't worry about perfection. The oven will smooth the edges.
For bakery-sized cookies, use a full 1/4 cup of batter. For more modest portions, use 3 tablespoons and reduce baking time by 2 minutes. - 6
Bake until set
Bake for 13 to 15 minutes, rotating the pan halfway through. The cookies are done when the edges are just barely golden and the tops spring back when lightly pressed. The centers may look slightly underdone. This is correct. They will firm as they cool. Pull them a minute early rather than a minute late.
Overbaked black and whites turn dry and crumbly within a day. The goal is moist and cakey, not crisp or browned. - 7
Cool completely
Let the cookies cool on the baking sheet for 5 minutes, then transfer to a wire rack. Cool completely, flat side up, before icing. This takes about 30 minutes. Resist the urge to rush this step. Warm cookies will cause the fondant to run and pool unevenly.
- 8
Make vanilla fondant
In a medium bowl, whisk together the sifted powdered sugar, corn syrup, and 2 teaspoons vanilla extract. Add hot water one tablespoon at a time, stirring constantly, until you reach a thick but pourable consistency. The icing should coat the back of a spoon thickly and drip off in a slow ribbon. Test it on a plate first. It should spread easily but set firm within a minute.
- 9
Make chocolate fondant
Transfer half the vanilla fondant to another bowl. Sift the Dutch-process cocoa powder into it and stir until smooth. The cocoa will thicken the icing. Add an additional tablespoon of hot water and stir until you match the consistency of the vanilla side. Both icings should flow the same way.
Dutch-process cocoa produces a richer, darker color than natural cocoa. For the most authentic NYC bakery look, Dutch-process is essential. - 10
Ice the cookies
Turn the cookies flat-side up. This is the icing surface, smooth and even. Using a small offset spatula or butter knife, spread vanilla fondant over one half of each cookie, creating a clean line down the center. Work from the middle outward to avoid pushing icing off the edge. Let the vanilla set for 2 minutes, then spread chocolate fondant on the other half, meeting the vanilla at the center line. The slight gap between applications helps create a clean division.
- 11
Set the icing
Let the iced cookies rest at room temperature for at least 30 minutes until the fondant sets completely. It should feel dry to the touch and hold a fingerprint without sticking. The surface will develop that characteristic semi-matte shine that marks a proper black and white.
Chef Tips
- •The sour cream is non-negotiable. It provides moisture, tang, and tenderness that no other ingredient can replicate. Full-fat only. Low-fat versions will produce a drier cookie.
- •Let all dairy ingredients come to room temperature before mixing. This takes about an hour. Cold ingredients won't emulsify properly and can cause the batter to break.
- •Sift your powdered sugar for the icing, even if the package claims it's pre-sifted. Lumps will show in the finished fondant and there's no fixing them once the icing sets.
- •If your fondant starts to set before you've finished icing, place the bowl over a pot of barely simmering water and stir until it loosens. Work in small batches to keep the icing pliable.
- •The flat bottom of the cookie becomes the icing surface. This is traditional and practical. The domed top would cause icing to run off the sides.
- •Store at room temperature in a single layer, loosely covered with plastic wrap. The refrigerator will make the icing sweat. Properly stored, they keep 3 to 4 days.
Advance Preparation
- •Cookie batter can be portioned onto parchment-lined sheets, covered with plastic wrap, and refrigerated overnight. Let sit at room temperature for 15 minutes before baking. Add 1-2 minutes to baking time.
- •Baked, un-iced cookies can be stored in an airtight container at room temperature for up to 2 days or frozen for up to 2 months. Thaw completely before icing.
- •Fondant icing is best made fresh. It can be prepared up to 2 hours ahead and kept at room temperature, covered with plastic wrap pressed directly against the surface. Rewarm gently over simmering water if it stiffens.
- •Fully iced cookies freeze beautifully. Place in a single layer on a sheet pan, freeze until solid, then stack between layers of parchment in an airtight container. Thaw at room temperature for 2 hours before serving.
Frequently Asked Questions
Nutrition Information
1 cookie (about 67g)
Where cooking meets culture.
Culinary mentorship, cultural storytelling, and the editorial depth that makes cooking meaningful.
Explore Culinary Advisor