Culinary Advisor
A cooking platform built around craft, culture, and the stories behind what we eat.
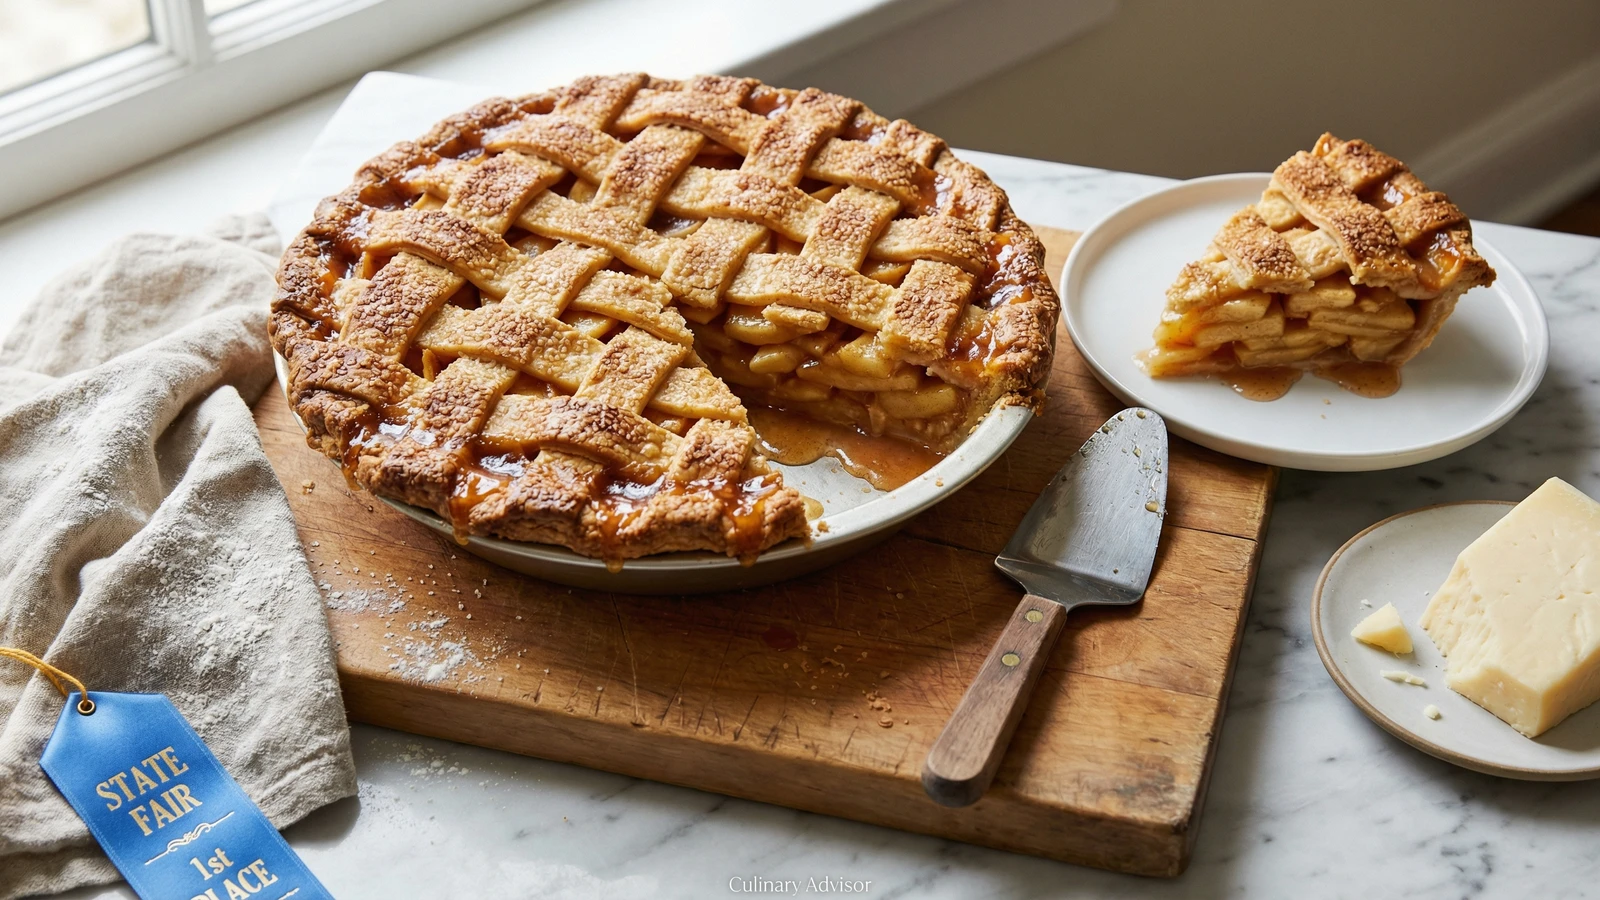
Minnesota Honeycrisp Apple Pie
A towering double-crust pie celebrating Minnesota's pride and joy: the Honeycrisp apple, its sweet-tart flesh nestled in warm spices and encased in a shatteringly flaky lard crust that would win any state fair blue ribbon.
The Honeycrisp apple exists because of patience, persistence, and the University of Minnesota's agricultural researchers who refused to accept mediocrity. In 1960, they crossed a Keepsake with an unknown variety. Thirty-one years later, in 1991, they finally released the result to the public. That's three decades of testing, tasting, and waiting for perfection. The Honeycrisp was worth every year.
What makes this apple extraordinary for pie is what makes it extraordinary for eating: cells so large they burst with juice when you bite through, a sugar-acid balance that holds up to heat, and flesh that softens without turning to mush. Most apples surrender completely to a hot oven. Honeycrisps maintain their dignity.
The crust here follows Upper Midwest tradition. Scandinavian and German immigrants who settled Minnesota's farmland knew that lard, rendered from the hogs they raised, produced the flakiest pastry imaginable. Butter adds flavor, lard adds texture. I give you both options because I understand not everyone keeps lard in their refrigerator, though perhaps you should. The technique remains the same: keep everything cold, work quickly, and never apologize for a rustic edge.
This is the pie that wins ribbons at the Minnesota State Fair, the pie that appears on Thanksgiving tables from Duluth to Rochester, the pie that reminds Minnesotans why they endure those winters. Make it once and you'll understand.
The technique, the tradition, and the story behind every dish.
Discover Culinary AdvisorIngredients
all-purpose flour (for crust)
Quantity
2 1/2 cups (315g)
granulated sugar (for crust)
Quantity
1 tablespoon
fine sea salt (for crust)
Quantity
1 teaspoon
cold lard or unsalted butter
Quantity
1 cup (8 oz lard or 2 sticks butter)
cubed
ice water
Quantity
6 to 8 tablespoons
Honeycrisp apples
Quantity
3 1/2 pounds (7-8 medium)
granulated sugar (for filling)
Quantity
3/4 cup (150g)
all-purpose flour (for filling)
Quantity
2 tablespoons
cornstarch
Quantity
1 tablespoon
ground cinnamon
Quantity
1 1/2 teaspoons
nutmeg
Quantity
1/4 teaspoon
freshly grated
ground allspice
Quantity
1/8 teaspoon
fine sea salt (for filling)
Quantity
pinch
fresh lemon juice
Quantity
2 tablespoons
pure vanilla extract
Quantity
1 teaspoon
cold unsalted butter (for filling)
Quantity
2 tablespoons
cut into small pieces
large egg
Quantity
1
heavy cream or whole milk
Quantity
1 tablespoon
turbinado sugar
Quantity
2 teaspoons
| Ingredient | Quantity |
|---|---|
| all-purpose flour (for crust) | 2 1/2 cups (315g) |
| granulated sugar (for crust) | 1 tablespoon |
| fine sea salt (for crust) | 1 teaspoon |
| cold lard or unsalted buttercubed | 1 cup (8 oz lard or 2 sticks butter) |
| ice water | 6 to 8 tablespoons |
| Honeycrisp apples | 3 1/2 pounds (7-8 medium) |
| granulated sugar (for filling) | 3/4 cup (150g) |
| all-purpose flour (for filling) | 2 tablespoons |
| cornstarch | 1 tablespoon |
| ground cinnamon | 1 1/2 teaspoons |
| nutmegfreshly grated | 1/4 teaspoon |
| ground allspice | 1/8 teaspoon |
| fine sea salt (for filling) | pinch |
| fresh lemon juice | 2 tablespoons |
| pure vanilla extract | 1 teaspoon |
| cold unsalted butter (for filling)cut into small pieces | 2 tablespoons |
| large egg | 1 |
| heavy cream or whole milk | 1 tablespoon |
| turbinado sugar | 2 teaspoons |
Equipment Needed
- •9-inch pie plate (glass or ceramic)
- •Pastry blender or two knives
- •Rolling pin
- •Rimmed baking sheet
- •Wire cooling rack
- •Pastry brush
Instructions
- 1
Build the dough
Whisk together the flour, one tablespoon sugar, and one teaspoon salt in a large bowl. Add your cold fat, whether lard or butter. Using a pastry blender or two knives, cut the fat into the flour until you have a mix of pea-sized and almond-sized pieces. This unevenness is deliberate. Those larger pieces will create the flaky layers you're after.
If using butter, freeze it for fifteen minutes before cutting. Lard can come straight from the refrigerator. The goal is fat cold enough to stay solid while you work. - 2
Add water carefully
Drizzle six tablespoons of ice water over the flour mixture. Toss with a fork until the dough begins to clump together. Grab a handful and squeeze. If it holds together without crumbling, you have enough water. If it falls apart, add another tablespoon and test again. The dough should look shaggy and rough, not smooth.
- 3
Shape and chill
Turn the dough onto a lightly floured surface. Gather it into a rough mass, then divide in two, making one portion slightly larger than the other. The larger piece becomes your bottom crust. Flatten each into a disk about an inch thick, wrap tightly in plastic, and refrigerate for at least one hour, or overnight. Cold dough rolls easier and bakes flakier.
Dough can rest in the refrigerator for up to three days. If it firms too much, let it sit at room temperature for ten minutes before rolling. - 4
Prepare the apples
Peel, core, and slice your Honeycrisps into pieces about a quarter-inch thick. Uniformity matters here because you want even cooking. Some slices tender, some crunchy, is not what we're after. Place them in a large bowl as you work.
- 5
Season the filling
In a small bowl, whisk together the three-quarters cup sugar, two tablespoons flour, cornstarch, cinnamon, nutmeg, allspice, and a pinch of salt. Pour this mixture over the apples along with the lemon juice and vanilla. Toss thoroughly with your hands, ensuring every slice gets coated. Let this sit for fifteen minutes while you roll the dough. The sugar draws out moisture that will become your pie's syrupy sauce.
- 6
Roll the bottom crust
On a floured surface, roll the larger dough disk into a circle about twelve inches across, rotating a quarter turn after each pass to prevent sticking. The dough should be about an eighth of an inch thick. Drape it over your rolling pin and transfer to a nine-inch pie plate. Ease it into the corners without stretching. Stretched dough shrinks when baked. Trim edges to leave a one-inch overhang. Refrigerate while you roll the top.
- 7
Roll the top crust
Roll the smaller disk to about eleven inches across. You can leave it whole for a traditional top, or cut it into strips for a lattice. A lattice allows steam to escape and lets you see that gorgeous filling bubbling. Either approach is honest. Set aside on a parchment-lined sheet and refrigerate if the kitchen is warm.
- 8
Fill the pie
Pour the apple mixture into the chilled bottom crust, mounding it slightly higher in the center. The apples will settle as they cook. Dot the surface with the two tablespoons of cold butter pieces. These melt into the filling and add richness that sugar alone cannot provide.
- 9
Top and seal
Drape the top crust over the filling, or weave your lattice if you've chosen that path. Trim excess, leaving a half-inch border. Fold the overhang under itself to create a thick edge resting on the rim of the pie plate. Crimp with your fingers or press with fork tines. The seal matters. It keeps juices inside where they belong.
- 10
Prepare for the oven
Whisk the egg with the cream to make an egg wash. Brush this generously over the entire top crust, getting into the crimped edges. Sprinkle turbinado sugar over everything. The large crystals catch light and add crunch. If using a solid top crust, cut four or five vents with a sharp knife to let steam escape. Place the pie on a rimmed baking sheet to catch any drips.
- 11
Bake in stages
Position a rack in the lower third of your oven and preheat to 425 degrees. Bake the pie for twenty minutes at this high temperature. The heat sets the crust quickly, building structure before the butter melts completely. Reduce heat to 375 degrees and continue baking for forty to fifty minutes more, until the crust is deep golden brown and you can see thick juices bubbling through the vents or lattice.
If the edges brown too quickly, shield them with strips of aluminum foil or a pie crust shield. Start checking at the thirty-minute mark. - 12
Rest before slicing
This is the hardest instruction. Let the pie cool on a wire rack for at least two hours before cutting. The filling needs time to set. Cut too soon and you'll have delicious apple soup in a crust. Cut at the right moment and you'll have slices that hold their shape while remaining juicy. Patience rewards.
Chef Tips
- •If you can find leaf lard, rendered from the fat around a pig's kidneys, use it. It produces the flakiest crust imaginable and has almost no pork flavor. Regular lard works well. Butter makes a delicious pie with a slightly different character, more flavorful but less shatteringly crisp.
- •Honeycrisps are sweeter than traditional pie apples. Taste your fruit before adding sugar. If the apples are particularly sweet, reduce sugar to half a cup. The lemon juice provides necessary acid to balance, so don't skip it.
- •The flour and cornstarch together create a filling that thickens without becoming gluey. Flour alone can taste starchy. Cornstarch alone can make the juices too slick. Together they're perfect.
- •Serve with sharp cheddar cheese, as they do in the Upper Midwest. The salt and tang of good aged cheddar against sweet spiced apples is a revelation. Vanilla ice cream is the expected accompaniment, but cheese is the traditional one.
Advance Preparation
- •Pie dough can be refrigerated for up to three days or frozen for up to three months. Thaw overnight in the refrigerator before rolling.
- •The assembled unbaked pie can be frozen for up to two months. Bake directly from frozen, adding fifteen to twenty minutes to the total baking time. Do not thaw first.
- •Baked pie keeps at room temperature, loosely covered, for two days. Refrigerate after that, and rewarm slices in a 350-degree oven for ten minutes to revive the crust.
Frequently Asked Questions
Nutrition Information
1 serving (about 340g)
Where cooking meets culture.
Culinary mentorship, cultural storytelling, and the editorial depth that makes cooking meaningful.
Explore Culinary Advisor