Culinary Advisor
A cooking platform built around craft, culture, and the stories behind what we eat.
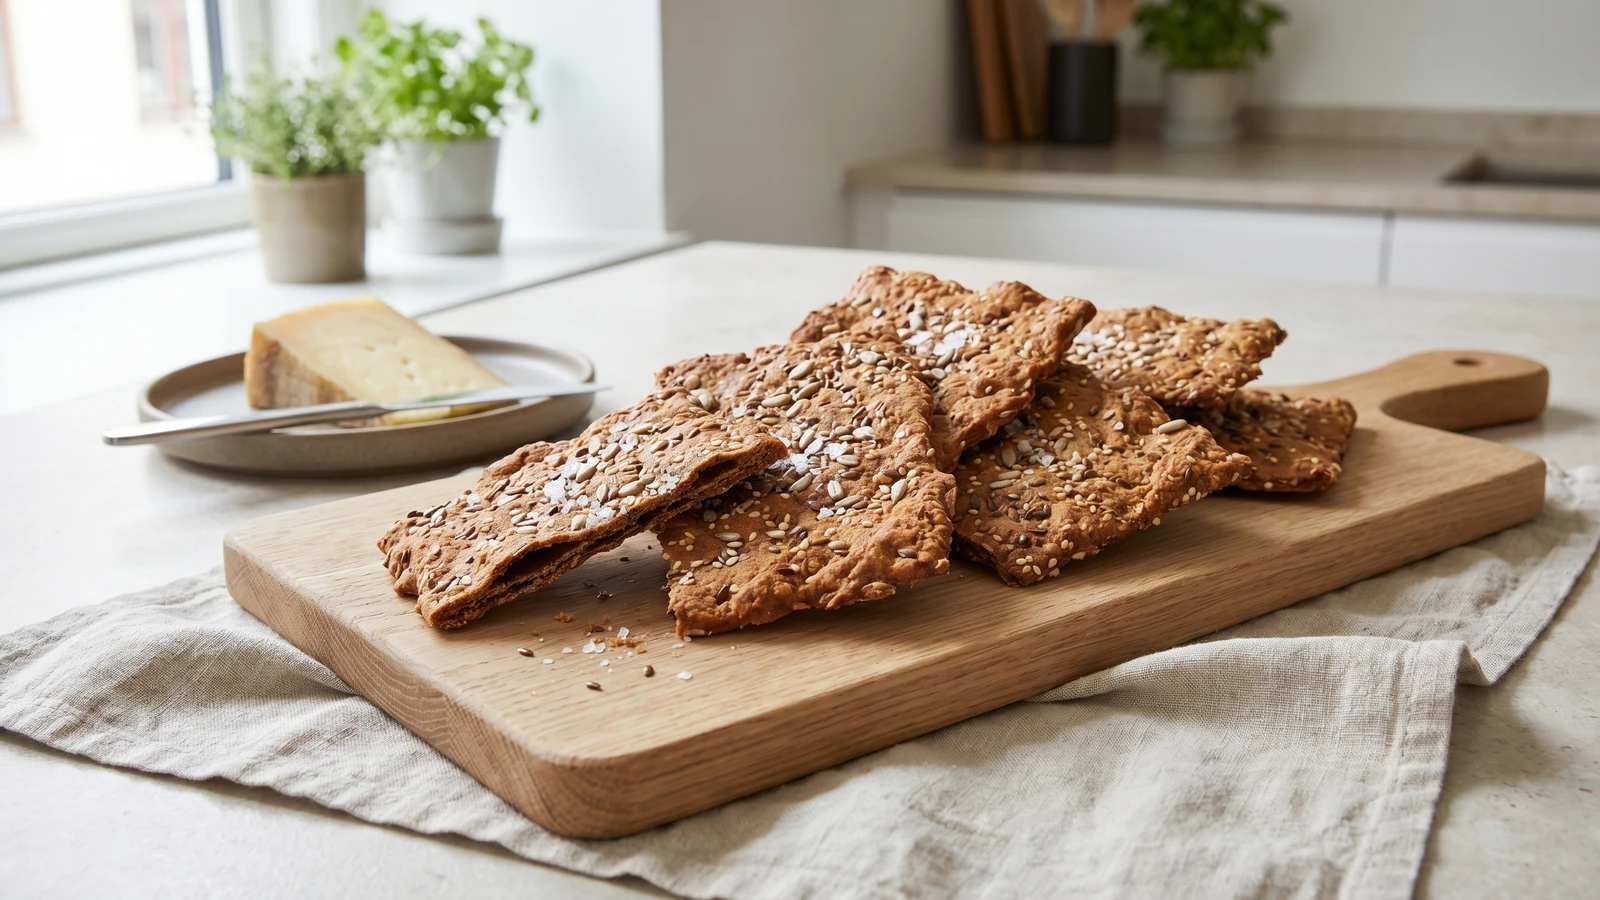
Knaekbrod
Created by Chef Freja
Danish rye crispbread with seeds and flaky salt, rolled thin and baked until it snaps clean. The bread that waits in the tin for soup, cheese, or the moment you need something on the table in thirty seconds.
November is when the bread tin matters. The soups are back, the cheese board comes out in the evenings, and the kitchen needs something that sits quietly on the shelf and is ready when you are. Knaekbrod is that bread.
It's not the bread you make for a single meal. It's the bread you make on a Sunday afternoon, and then it's there, in the tin, for the next three weeks. Beside the kartoffelsuppe on a Tuesday. Under a slice of aged Danbo with a cup of coffee. Snapped into pieces and set out when someone arrives and you want something on the table without fuss. In a Danish kitchen, this is the bread that holds the gaps between the meals that take longer.
The technique is simple, but the thinness is everything. Roll it as thin as your patience allows. Two millimetres is what you're after. Anything thicker and it's just hard bread. When it's right, knaekbrod snaps cleanly when you break it, and the seeds and salt catch the light along the broken edge. You'll know when it's right. The sound it makes will tell you.
Crispbread has been baked across Scandinavia since the Viking Age, originally as a preservation method. Grain was milled, mixed with water, rolled thin, and baked hard so it could be stored through the long winters when fresh bread wasn't possible. In Denmark, knaekbrod became distinct from Swedish knäckebröd through its heavier use of dark rye flour and seeds, reflecting the grain culture of the Danish islands and Jutland. The tradition nearly disappeared in the mid-twentieth century as commercial crispbreads replaced home-baked versions, but it has returned to Danish home kitchens in the last two decades, part of a broader revival of wholegrain baking and the understanding that bread you make yourself keeps better and costs almost nothing.
The technique, the tradition, and the story behind every dish.
Discover Culinary AdvisorIngredients
dark rye flour
Quantity
200g
wholemeal spelt flour
Quantity
100g
rolled oats
Quantity
50g
sunflower seeds
Quantity
40g
flax seeds
Quantity
30g
sesame seeds
Quantity
20g
fine sea salt
Quantity
1 teaspoon
flaky sea salt
Quantity
1 teaspoon
for finishing
warm water
Quantity
300ml
cold-pressed rapeseed oil
Quantity
2 tablespoons
| Ingredient | Quantity |
|---|---|
| dark rye flour | 200g |
| wholemeal spelt flour | 100g |
| rolled oats | 50g |
| sunflower seeds | 40g |
| flax seeds | 30g |
| sesame seeds | 20g |
| fine sea salt | 1 teaspoon |
| flaky sea saltfor finishing | 1 teaspoon |
| warm water | 300ml |
| cold-pressed rapeseed oil | 2 tablespoons |
Equipment Needed
- •Rolling pin
- •Two large baking sheets
- •Parchment paper
- •Pizza wheel or sharp knife for scoring
- •Airtight tin for storage
Instructions
- 1
Mix the dough
Combine the rye flour, spelt flour, oats, sunflower seeds, flax seeds, sesame seeds, and fine sea salt in a large bowl. Stir them together so the seeds are evenly distributed. Pour in the warm water and the rapeseed oil. Mix with a wooden spoon until you have a thick, sticky batter. It won't feel like bread dough. Rye has almost no gluten, so you're not building structure through kneading. You're building it through thinness and heat. Let the mixture rest for ten minutes. The rye will absorb the water and the batter will thicken and become easier to handle.
If the dough feels too wet after resting, add a tablespoon more rye flour. If it's cracking and dry, add a splash of water. You want it cohesive but not pourable. - 2
Heat the oven
Set the oven to 180C. Line two large baking sheets with parchment paper. You'll bake in batches, and having both sheets ready means you can roll the next batch while the first one bakes.
- 3
Roll the crispbreads
Divide the dough into portions about the size of a walnut. Place one on a sheet of parchment paper and lay another sheet on top. Roll each portion out as thinly as you can manage, aiming for two millimetres or less. The thinner you roll, the crispier the result. This is the step that matters most. Thick knaekbrod is just hard bread. Thin knaekbrod shatters when you snap it, and that snap is the whole point.
Rolling between two sheets of parchment prevents sticking without adding extra flour, which would toughen the surface. If the dough resists and springs back, let it rest for a minute under the parchment. It will relax. - 4
Score and season
Peel off the top parchment and transfer each rolled piece onto the lined baking sheet. If the shapes are rough and uneven, leave them. That's honest. Use a knife or a pizza wheel to score each crispbread into rectangles or squares, pressing down firmly but not cutting all the way through. The score lines let you snap them cleanly later and help steam escape during baking, which keeps them flat. Sprinkle the tops with flaky sea salt. Press it gently into the surface so it holds.
- 5
Bake until dry and golden
Bake for twelve to fifteen minutes, checking after ten. You're looking for an even deep golden colour across the whole surface with the edges slightly darker. The crispbreads should feel firm and dry when you tap them. If the centre still gives under your finger, they need more time. Pull them when the colour is right and the surface is completely matte, no sheen of moisture anywhere. Let them cool on the tray. They will crisp further as they cool. If they're still slightly flexible when warm, that's normal. Give them five minutes.
Every oven runs differently. The first batch is your calibration. If they colour unevenly, rotate the tray halfway through. If they're done at the edges but pale in the middle, your oven has hot spots. Adjust the next batch. - 6
Cool and snap apart
Once completely cool, snap the crispbreads apart along the score lines. They should break cleanly with a satisfying crack. If they crumble instead of snapping, they were rolled too thick or pulled from the oven too soon. Store in an airtight tin. In a dry kitchen, they'll keep for three weeks or longer, and they taste just as good on day twenty as they do on day one. That's the beauty of knaekbrod. You make a batch and the kitchen is stocked.
Chef Tips
- •Use the darkest rye flour you can find. Stone-ground and coarse is best. Fine white rye makes a blander crispbread with less character. The flour should smell earthy and slightly sour when you open the bag. That's the flavour you're baking into the bread.
- •Vary the seeds to suit your kitchen. Pumpkin seeds, poppy seeds, or caraway all belong. What matters is that you use enough. Seeds are not decoration here. They're structure. They give the crispbread its texture and most of its flavour.
- •Cold-pressed rapeseed oil is the Danish fat for this bread, not olive oil. Rapeseed has a mild, nutty flavour that complements rye without competing. It's the oil that belongs in a Danish kitchen the way olive oil belongs in an Italian one.
- •If your crispbreads are soft after cooling, put them back in the turned-off oven with the door ajar for ten minutes. The residual heat will finish drying them without burning.
Advance Preparation
- •Knaekbrod keeps for three weeks or longer in an airtight tin in a dry kitchen. This is a make-ahead bread by nature. One batch covers you for the better part of a month.
- •The dough can rest for up to an hour at room temperature if you need to pause between rolling and baking. Cover it with a damp cloth so the surface doesn't dry out.
Frequently Asked Questions
Nutrition Information
1 serving (about 25g)
Where cooking meets culture.
Culinary mentorship, cultural storytelling, and the editorial depth that makes cooking meaningful.
Explore Culinary Advisor