Culinary Advisor
A cooking platform built around craft, culture, and the stories behind what we eat.
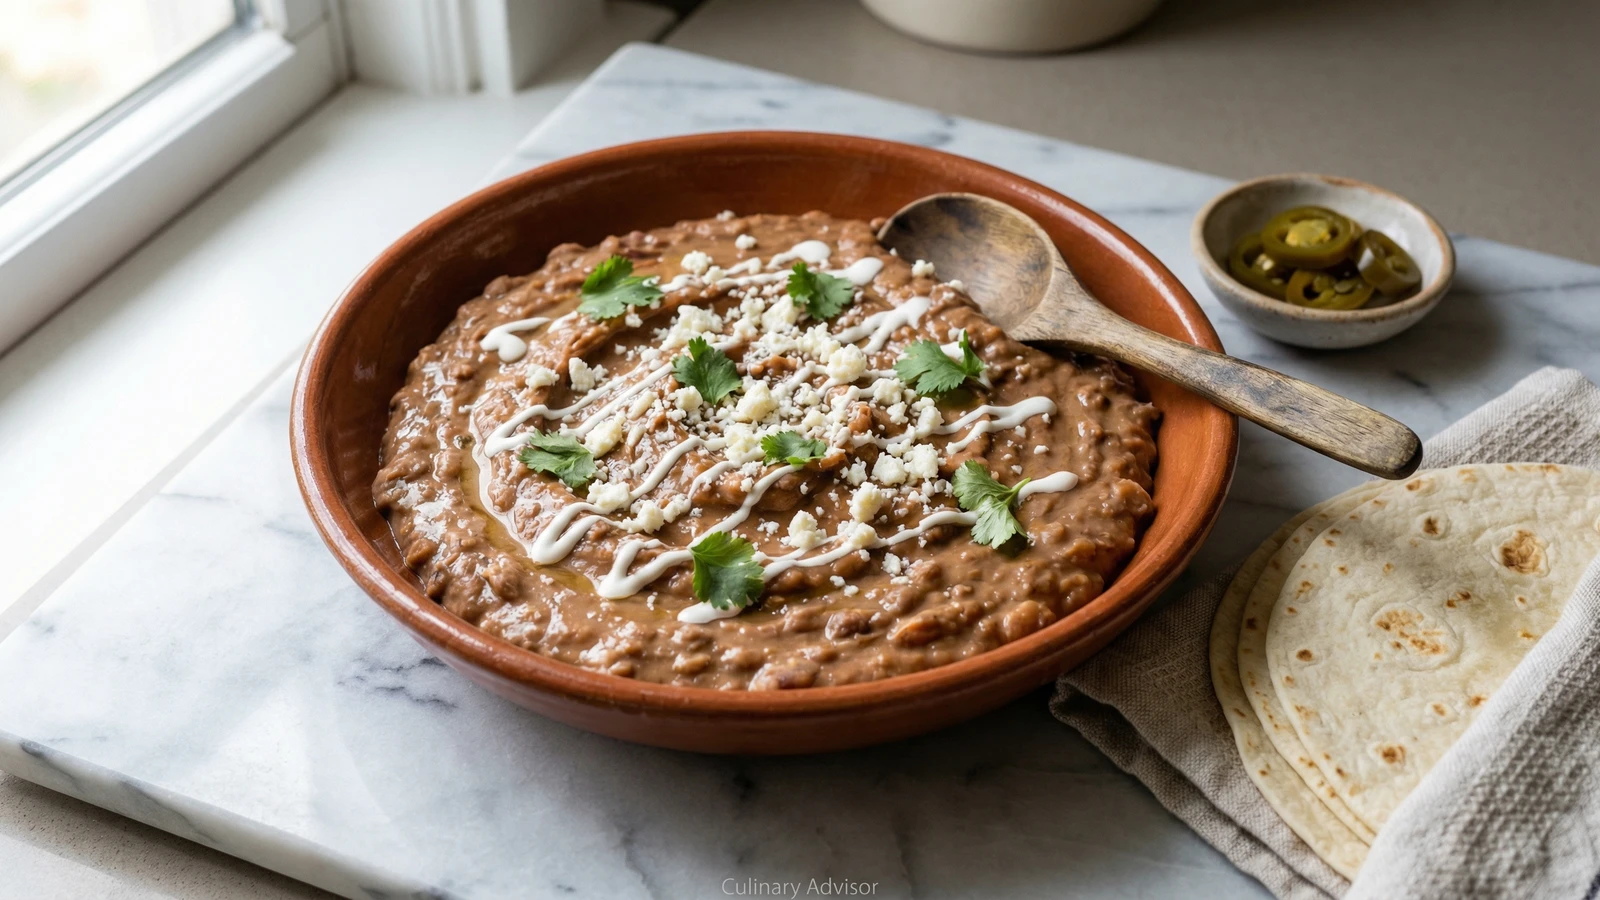
Homestyle Refried Beans
Created by
Dried pinto beans simmered until tender, then mashed and fried in honest fat until they turn glossy, creamy, and deeply satisfying. This is the foundation of every great Tex-Mex spread.
The border towns of Texas and Mexico share many things: families, languages, and a fierce devotion to frijoles refritos. These beans have fed ranch hands and senators, appeared at quinceañeras and Tuesday suppers, traveled in casserole dishes to church potlucks and neighborhood barbecues. They are democratic food in the truest sense.
Forget the canned versions with their tinny undertaste and suspicious uniformity. Real refried beans start with dried pintos, cooked low and slow until they surrender completely, then fried in proper fat until they achieve that characteristic glossy sheen. The fat is essential. Lard is traditional, bacon drippings are acceptable, and even vegetable oil works in a pinch. But the fat carries flavor and creates texture that water never could.
I learned to make these beans from a woman in Laredo who laughed at my first attempt. Too much liquid, she said, and not enough patience. The beans need time in the hot fat to concentrate their flavor and develop body. Rush them and you get bean soup. Give them their due and you get something worth crossing a border for.
Make a big batch. They reheat beautifully, travel well to potlucks, and improve after a night in the refrigerator as the flavors meld. Thin them with a little warm water or stock when reheating, and they'll return to their original creamy glory.
The technique, the tradition, and the story behind every dish.
Discover Culinary AdvisorIngredients
dried pinto beans
Quantity
1 pound
white onion
Quantity
1 medium
halved (one half for cooking, one half diced)
garlic cloves
Quantity
6
4 whole for cooking, 2 minced
bay leaves
Quantity
2
kosher salt
Quantity
1 tablespoon, plus more to taste
lard, bacon fat, or vegetable oil
Quantity
1/2 cup
ground cumin
Quantity
1 teaspoon
black pepper
Quantity
1/2 teaspoon
freshly ground
reserved bean cooking liquid
Quantity
1 cup, plus more as needed
cotija cheese (optional)
Quantity
for serving
crumbled
fresh cilantro (optional)
Quantity
for serving
chopped
Mexican crema or sour cream (optional)
Quantity
for serving
| Ingredient | Quantity |
|---|---|
| dried pinto beans | 1 pound |
| white onionhalved (one half for cooking, one half diced) | 1 medium |
| garlic cloves4 whole for cooking, 2 minced | 6 |
| bay leaves | 2 |
| kosher salt | 1 tablespoon, plus more to taste |
| lard, bacon fat, or vegetable oil | 1/2 cup |
| ground cumin | 1 teaspoon |
| black pepperfreshly ground | 1/2 teaspoon |
| reserved bean cooking liquid | 1 cup, plus more as needed |
| cotija cheese (optional)crumbled | for serving |
| fresh cilantro (optional)chopped | for serving |
| Mexican crema or sour cream (optional) | for serving |
Equipment Needed
- •Large heavy-bottomed pot or Dutch oven
- •12-inch cast iron skillet
- •Potato masher or sturdy wooden spoon
- •Fine-mesh strainer or colander
Instructions
- 1
Sort and rinse beans
Spread the dried beans across a rimmed baking sheet and pick through them carefully. You're looking for small stones, shriveled beans, and debris that snuck past the packaging line. This takes two minutes and saves you from a cracked tooth. Rinse the sorted beans in a colander under cold running water until the water runs clear.
- 2
Cook the beans
Transfer beans to a large heavy pot and cover with cold water by three inches. Add one onion half, four whole garlic cloves, and the bay leaves. Bring to a boil over high heat, then immediately reduce to a gentle simmer. The surface should barely ripple. Cook uncovered for two to two and a half hours, until a bean smashes easily between your fingers with no chalky center.
Add salt only in the final thirty minutes of cooking. Early salting can toughen the bean skins, though opinions vary. I've found patience pays off here. - 3
Reserve the liquid
When beans are tender, add one tablespoon of salt and let them rest in the cooking liquid for ten minutes. This seasons them thoroughly. Drain the beans over a large bowl, saving every drop of that cooking liquid. It's liquid gold, starchy and full of flavor. Discard the onion half, garlic cloves, and bay leaves.
- 4
Build the flavor base
Heat the lard or bacon fat in a large cast iron skillet or heavy pot over medium heat until it shimmers. Add the diced onion half and cook, stirring occasionally, until soft and golden at the edges, about six minutes. The kitchen will smell like every taqueria you've ever loved. Add the minced garlic, cumin, and black pepper. Stir constantly for one minute until fragrant.
- 5
Add and mash beans
Add the drained beans to the skillet in batches, mashing them with a potato masher or the back of a heavy wooden spoon as you go. Work in about a cup of the reserved cooking liquid, mashing and stirring until you reach your desired consistency. Some folks want them smooth as velvet. Others prefer chunky, with whole beans scattered throughout. Both are correct.
The name 'refried' comes from the Spanish 'refritos,' which means 'well-fried,' not 'fried twice.' You're cooking them thoroughly in fat, which is the whole point. - 6
Fry until glossy
Continue cooking over medium heat, stirring frequently, for another eight to ten minutes. The beans will absorb the fat, tighten up, then relax again as they fry. You'll see the edges start to pull away from the pan and the surface develop a glossy sheen. Listen for the gentle sizzle. That's the sound of flavor developing.
- 7
Adjust consistency and season
Taste and add more salt if needed. The beans should be creamy and rich, holding their shape on a spoon but not stiff. If they've tightened too much, stir in more cooking liquid a few tablespoons at a time. Remember they'll thicken as they cool, so err on the side of slightly loose.
- 8
Serve with garnishes
Transfer to a warm serving bowl and top with crumbled cotija, a drizzle of crema, and fresh cilantro. Or serve them plain, letting that honest bean flavor speak for itself. These beans are complete the moment they leave the pan.
Chef Tips
- •Save your bacon fat in a jar in the refrigerator. Every strip of bacon you cook is an investment in future refried beans. A few tablespoons of bacon fat transforms these from good to unforgettable.
- •The bean cooking liquid is precious. Freeze what you don't use for reheating leftovers or thinning soups. It has more body than water and carries the essence of the beans.
- •For a smoky variation, add a dried chipotle pepper or two to the pot while the beans simmer. Remove it before mashing unless you want serious heat throughout.
- •If you're feeding a crowd, these beans hold beautifully in a slow cooker set to warm. Add a splash of cooking liquid and stir every thirty minutes.
Advance Preparation
- •Cooked beans can be prepared through step 3 up to three days ahead. Refrigerate beans and cooking liquid separately.
- •Finished refried beans keep refrigerated for up to five days. Reheat gently with a splash of reserved cooking liquid or water.
- •Refried beans freeze well for up to three months. Thaw overnight in the refrigerator and reheat with added liquid to restore creaminess.
Frequently Asked Questions
Nutrition Information
1 serving (about 160g)
Where cooking meets culture.
Culinary mentorship, cultural storytelling, and the editorial depth that makes cooking meaningful.
Explore Culinary Advisor