Culinary Advisor
A cooking platform built around craft, culture, and the stories behind what we eat.
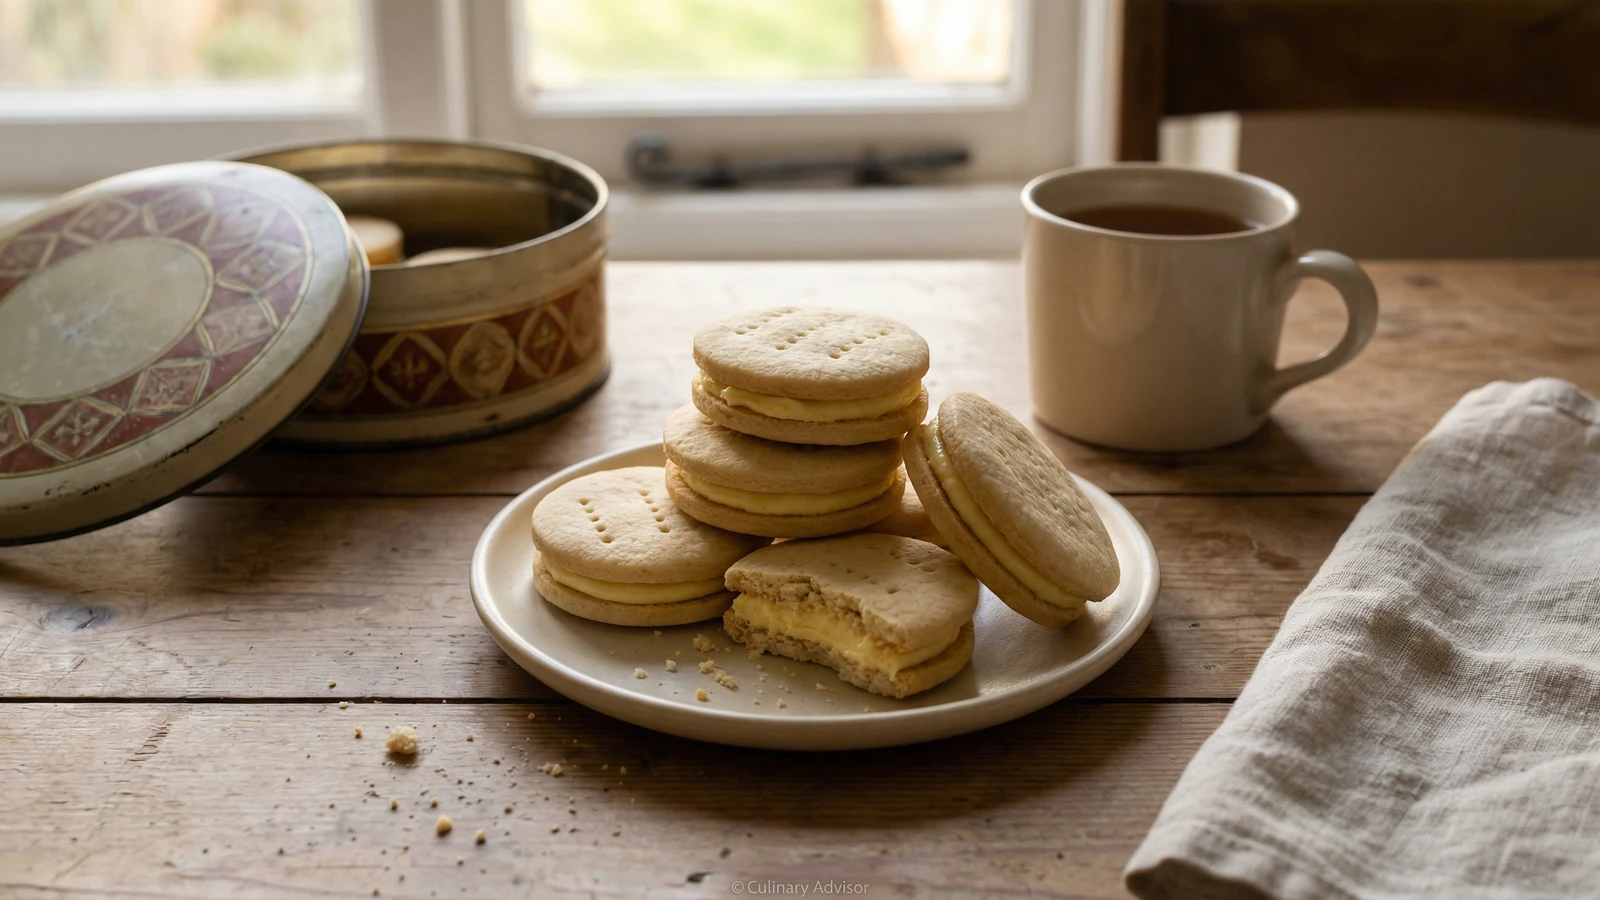
Homemade Custard Creams
Created by Chef Thomas
Two crisp vanilla biscuits sandwiched around a pale yellow custard buttercream, made properly at home and quietly better than the packet you grew up with.
There's a rainy afternoon in October when the kettle has been on three times and the kitchen smells faintly of vanilla, and the right thing to make is a tin of custard creams. Not because anyone asked. Because it's that kind of afternoon and you've got an hour and the radio on.
These are the biscuit of every British childhood. The packet ones are perfectly fine; I'm not going to pretend otherwise. But making them yourself turns the whole thing into something else entirely. The biscuit is shorter and sandier, with a proper snap. The filling tastes of butter and vanilla instead of vegetable fat and longing. And the smell of custard powder hitting warm butter is one of those small kitchen pleasures that catches you off guard. It smells like being looked after.
I wrote it down in the notebook the first time I made them: "Custard creams. Tuesday. Rain. Worth it." That's still the whole review. We're only making biscuits, but a tin of these on the side is the kind of small, quiet generosity that makes a kitchen feel like a kitchen.
A recipe is a conversation, not a contract. If you want them rounder, cut them round. If you want a thicker layer of buttercream, give them a thicker layer. Your kitchen, your rules.
The technique, the tradition, and the story behind every dish.
Discover Culinary AdvisorIngredients
unsalted butter
Quantity
150g
softened
caster sugar
Quantity
75g
vanilla extract
Quantity
1 teaspoon
plain flour
Quantity
175g
custard powder
Quantity
50g
baking powder
Quantity
1/2 teaspoon
fine sea salt
Quantity
pinch
whole milk (optional)
Quantity
1 tablespoon
only if the dough feels dry
unsalted butter, for the filling
Quantity
100g
very soft
icing sugar, for the filling
Quantity
150g
sifted
custard powder, for the filling
Quantity
2 tablespoons
vanilla extract, for the filling
Quantity
1/2 teaspoon
whole milk, for the filling (optional)
Quantity
1 teaspoon
only if the buttercream feels stiff
| Ingredient | Quantity |
|---|---|
| unsalted buttersoftened | 150g |
| caster sugar | 75g |
| vanilla extract | 1 teaspoon |
| plain flour | 175g |
| custard powder | 50g |
| baking powder | 1/2 teaspoon |
| fine sea salt | pinch |
| whole milk (optional)only if the dough feels dry | 1 tablespoon |
| unsalted butter, for the fillingvery soft | 100g |
| icing sugar, for the fillingsifted | 150g |
| custard powder, for the filling | 2 tablespoons |
| vanilla extract, for the filling | 1/2 teaspoon |
| whole milk, for the filling (optional)only if the buttercream feels stiff | 1 teaspoon |
Equipment Needed
- •Mixing bowl
- •Wooden spoon or electric whisk
- •Rolling pin
- •Sharp knife or rectangular cutter
- •Two baking trays
- •Baking parchment
- •Wire cooling rack
- •Piping bag with a small round nozzle, optional
Instructions
- 1
Cream butter and sugar
Put the softened butter and caster sugar in a bowl and beat them together until pale and light. A wooden spoon is fine; an electric whisk is faster. You're after something that looks like thick cream and has lost its graininess. Add the vanilla and beat it through.
The butter has to be properly soft. Not melting, not greasy, but giving easily under your finger. Cold butter will fight you the whole way and you'll lose. - 2
Bring the dough together
Sift the flour, custard powder, baking powder and salt straight into the bowl. The custard powder is the whole point here, that pale yellow colour and the faint, nostalgic vanilla-and-something-else smell that tells you exactly what biscuit you're making. Mix gently with a wooden spoon, then bring it together with your hands. If it feels dry and won't quite cohere, add a tablespoon of milk. You want a soft, pliable dough, not a sticky one.
Don't overwork it. The moment it comes together into a single piece, stop. A worked dough makes a tough biscuit. - 3
Rest the dough
Flatten the dough into a disc, wrap it in cling film or baking parchment, and put it in the fridge for twenty minutes. This isn't optional. Cold dough rolls cleanly and holds its shape in the oven. Warm dough spreads and loses its edges, and the whole point of a custard cream is the edges.
- 4
Roll and cut
Heat the oven to 170C/150C fan. Line two baking trays with parchment. Roll the dough out on a lightly floured surface to about 4mm thick. Not paper-thin, but not chunky either. Cut into rectangles, around 4cm by 5cm, with a sharp knife and a ruler if you care about neatness, or freehand if you don't. You should get around thirty-two pieces, which makes sixteen sandwiched biscuits. Lay them on the trays with a little space between, then prick each one a few times with a fork. The fork holes are tradition. They also stop the biscuits from doming.
If you have a custard cream stamp or an embossing tool, by all means use it. Most of us don't. A fork makes a perfectly handsome biscuit and looks like it was made by a person, which it was. - 5
Bake until pale gold
Bake for twelve to fifteen minutes, until the biscuits are firm to the touch and just starting to colour at the edges. Don't wait for deep gold. You want them pale and sandy, the colour of the inside of a digestive, not the outside. They'll firm up as they cool. Lift them carefully onto a wire rack and leave them completely cold before you fill them. Warm biscuits and buttercream is a disaster you only make once.
- 6
Make the custard buttercream
Beat the very soft butter on its own for a minute until pale and fluffy. Add the sifted icing sugar and the custard powder a bit at a time, beating between additions so it doesn't fly out of the bowl. Add the vanilla. Beat for a couple of minutes until the buttercream is properly light, almost mousse-like, and the colour has gone from white to pale primrose yellow. If it feels stiff, add a teaspoon of milk. Taste it. It should taste of vanilla and butter and something that reminds you of being seven years old.
Sift the icing sugar properly. Lumps in buttercream are sad and entirely avoidable. - 7
Sandwich and finish
Match the biscuits up in pairs by size. Spoon or pipe a generous teaspoon of buttercream onto the flat side of one biscuit, then press its partner gently on top until the filling just reaches the edges. Not squeezing out, not stingy. Somewhere in between. Repeat with the rest. Leave them for half an hour for the filling to settle, if you can manage the wait.
Chef Tips
- •Custard powder is the soul of this biscuit. Bird's is the standard and there's no improving on it. Don't try to substitute cornflour or vanilla pudding mix. They taste of nothing in particular and you'll wonder why your biscuits have lost the plot.
- •Bake them paler than you think. A custard cream wants to be the colour of straw, not toast. Deep golden biscuits are delicious but they aren't custard creams. The colour matters because the memory matters.
- •Stored in an airtight tin, they keep beautifully for four or five days, and the texture actually improves overnight as the filling softens the biscuit very slightly at the join. Make them on a Sunday and you'll be glad of them all week.
- •If you have a piping bag, use it for the filling. A round nozzle gives you a tidier line and slightly less mess. If you don't, a teaspoon and a steady hand do the job perfectly well.
Advance Preparation
- •The biscuit dough can be made a day ahead and kept wrapped in the fridge. Let it sit out for ten minutes before rolling so it doesn't crack.
- •The unfilled biscuits keep in an airtight tin for up to a week. Fill them on the day you want to eat them, or the day before at the earliest.
- •Sandwiched biscuits keep in a tin for four to five days and are arguably better on the second day, once the filling has settled.
Frequently Asked Questions
Nutrition Information
1 serving (about 47g)
Where cooking meets culture.
Culinary mentorship, cultural storytelling, and the editorial depth that makes cooking meaningful.
Explore Culinary Advisor