Culinary Advisor
A cooking platform built around craft, culture, and the stories behind what we eat.
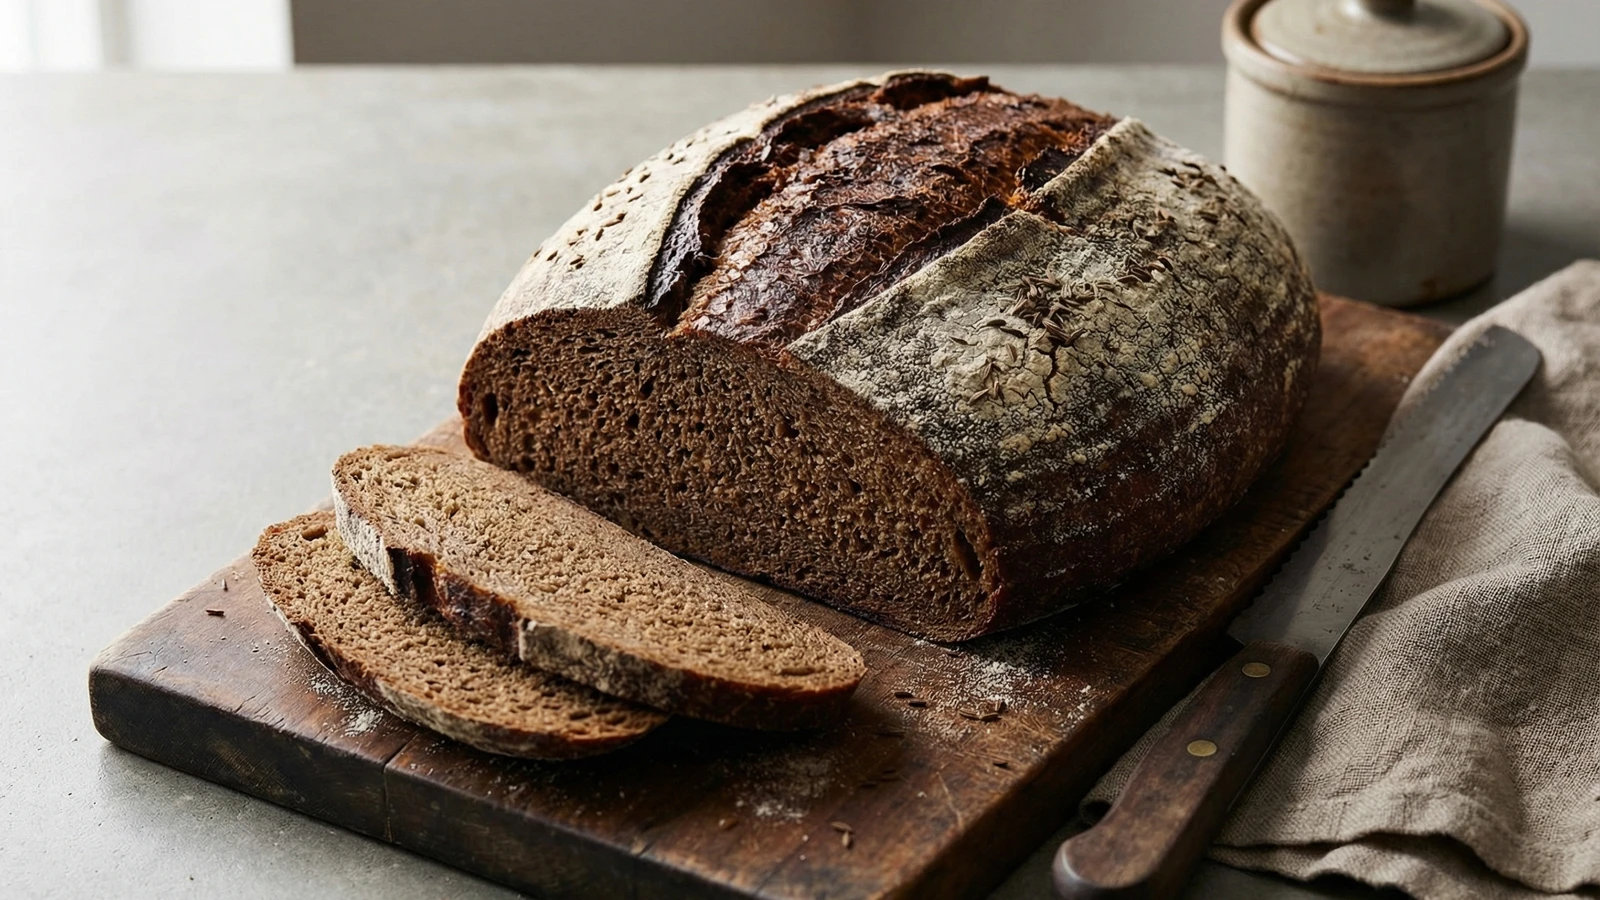
Dark Sourdough Rye
Created by
A dense, tangy loaf with an almost black crumb and crackling crust, built on centuries of Eastern European tradition and the patient alchemy of wild fermentation.
Rye bread is peasant food in the finest sense. For centuries across Germany, Poland, and Russia, families stretched what little wheat they had with the hardier grain that survived cold winters and poor soil. What began as necessity became preference. The complex, almost mineral tang of dark rye cannot be replicated with any other flour.
This loaf demands a different mindset than wheat bread. Rye flour contains pentosans rather than the gluten proteins that give wheat its stretch. You won't develop windowpane. You won't shape a taut boule. What you will produce is a bread of extraordinary depth, one that improves over three days as the flavors settle and intensify.
I learned to respect rye in the German bakeries of Milwaukee, where third-generation bakers still kept their starters in ceramic crocks and measured nothing. They worked by feel, knowing when the dough was ready by its sheen and tackiness. You'll develop that intuition too. But first, follow these weights precisely. Rye punishes improvisation until you understand its nature.
Expect a dense crumb with small, even holes. This is correct. The bread should feel substantial in your hand, slice thin without crumbling, and carry spreads without becoming soggy. Toast it. Serve it with smoked fish and strong cheese. This is bread with purpose.
The technique, the tradition, and the story behind every dish.
Discover Culinary AdvisorIngredients
active rye sourdough starter
Quantity
150g (1/2 cup + 2 tablespoons)
dark rye flour
Quantity
300g (2 1/3 cups)
bread flour
Quantity
100g (3/4 cup)
water, room temperature
Quantity
280g (1 1/4 cups)
fine sea salt
Quantity
10g (2 teaspoons)
blackstrap molasses
Quantity
30g (1 1/2 tablespoons)
caraway seeds
Quantity
15g (1 tablespoon)
plus more for topping
unsweetened cocoa powder
Quantity
10g (1 tablespoon)
butter or neutral oil
Quantity
for greasing pan
| Ingredient | Quantity |
|---|---|
| active rye sourdough starter | 150g (1/2 cup + 2 tablespoons) |
| dark rye flour | 300g (2 1/3 cups) |
| bread flour | 100g (3/4 cup) |
| water, room temperature | 280g (1 1/4 cups) |
| fine sea salt | 10g (2 teaspoons) |
| blackstrap molasses | 30g (1 1/2 tablespoons) |
| caraway seedsplus more for topping | 15g (1 tablespoon) |
| unsweetened cocoa powder | 10g (1 tablespoon) |
| butter or neutral oil | for greasing pan |
Equipment Needed
- •9x5 inch loaf pan
- •Digital kitchen scale
- •Danish dough whisk or sturdy wooden spoon
- •Instant-read thermometer
- •Bread lame or sharp serrated knife
- •Wire cooling rack
Instructions
- 1
Verify your starter
Your rye starter should be active and bubbly, having been fed within the past 4 to 8 hours. Drop a small spoonful into room temperature water. If it floats, proceed. If it sinks, feed your starter and wait another 4 hours. Rye starters are more active than wheat and should nearly double between feedings. The surface will look domed and slightly webbed with bubbles.
If you only have a wheat starter, you can convert it by feeding with rye flour for 3 to 4 consecutive days before baking. - 2
Combine dry ingredients
In a large mixing bowl, whisk together the dark rye flour, bread flour, cocoa powder, and caraway seeds until evenly distributed. The cocoa adds color and a subtle bitterness that complements rye's earthy character. It won't taste like chocolate.
- 3
Mix the dough
Dissolve the molasses in the room temperature water, stirring until fully incorporated. Add the active starter and stir to disperse. Pour this liquid into the dry ingredients along with the salt. Mix with a sturdy wooden spoon or Danish dough whisk until no dry flour remains. The dough will be sticky, dense, and heavy. It should look like thick, wet cement. This is correct. Do not add more flour.
Wet your hands or spoon frequently to prevent sticking. Rye dough clings to everything. - 4
Brief rest and fold
Let the dough rest for 30 minutes, covered with a damp towel or plastic wrap. Then, using a wet spatula or dough scraper, fold the dough over itself 8 to 10 times in the bowl, rotating as you go. This brief development is all the structure rye can achieve. The dough will feel slightly more cohesive but still quite sticky.
- 5
Bulk fermentation
Cover the bowl tightly and let the dough ferment at room temperature, ideally between 70°F and 75°F, for 3 to 4 hours. Unlike wheat dough, rye won't double dramatically. Look for a 25 to 50 percent rise, a slightly domed surface, and small bubbles visible through the sides of the bowl if using glass. The dough should smell tangy and almost fruity.
Rye ferments faster than wheat. In a warm kitchen above 78°F, check at 2.5 hours to avoid over-proofing. - 6
Prepare the loaf pan
Generously grease a 9x5 inch loaf pan with butter or neutral oil, making sure to coat the corners thoroughly. Rye bread sticks tenaciously. Dust the greased pan lightly with dark rye flour, tapping out any excess.
- 7
Shape the loaf
Turn the fermented dough onto a well-floured surface using dark rye flour. With wet hands, gently pat it into a rough rectangle about 8 inches wide. Working quickly, fold the short ends toward the center, overlapping slightly, then roll the dough toward you into a log shape. Transfer seam-side down into the prepared pan. Wet your hands and smooth the top surface, pressing gently to fill the pan corners. Sprinkle additional caraway seeds over the top if desired.
- 8
Final proof
Cover the pan loosely with plastic wrap or a damp towel. Let rise at room temperature for 1.5 to 2 hours, or until the dough crests about half an inch above the rim of the pan. The surface will develop small cracks. Poke the dough gently with a floured finger: it should spring back slowly but not completely, leaving a slight indentation.
For deeper flavor, proof overnight in the refrigerator for 8 to 12 hours, then let sit at room temperature for 1 hour before baking. - 9
Preheat and prepare oven
Position a rack in the lower third of your oven and preheat to 400°F for at least 30 minutes. Place a metal baking pan on the floor of the oven or lowest rack. You'll add water to this for steam during the first phase of baking.
- 10
Score and bake with steam
Using a sharp knife or lame dipped in water, score the top of the loaf with three diagonal slashes about half an inch deep. Work quickly and decisively. Place the loaf on the lower rack. Carefully pour one cup of hot water into the preheated pan below, immediately close the oven door. The burst of steam helps the crust develop properly before setting. Bake for 15 minutes with steam.
Stand back when adding water. The steam is fierce and will escape fast. - 11
Finish baking
After 15 minutes, reduce oven temperature to 375°F. Continue baking for 40 to 45 minutes more. The loaf is done when the crust is deeply browned, almost mahogany, and the internal temperature reaches 205°F to 210°F. The bread will sound hollow when tapped on the bottom. If you don't have a thermometer, err toward more time rather than less. Underbaked rye is gummy and unpleasant.
- 12
Cool completely
Remove the loaf from the pan immediately and transfer to a wire rack. This step is critical. Let the bread cool completely, at least 4 hours and preferably overnight, before slicing. Rye bread continues to set its crumb structure as it cools. Cutting too early results in a gummy, compressed interior. Patience here is non-negotiable.
Chef Tips
- •Dark rye flour and pumpernickel flour are the same thing in most American markets. Look for stone-ground whole rye for the best flavor. Bob's Red Mill and King Arthur both make reliable versions.
- •Rye bread improves dramatically over 2 to 3 days. Wrap the cooled loaf tightly in plastic, then foil, and store at room temperature. The crumb firms up, the tang mellows slightly, and the flavors integrate.
- •Slice this bread thin, no more than a quarter inch. It's too dense for thick slices. A sharp serrated knife and a sawing motion work best.
- •This bread is the foundation of a proper Reuben sandwich, a platform for gravlax, and the ideal companion to strong mustard and aged cheese. Treat it as a supporting player, not a solo act.
- •If your loaf sinks in the center or has a gummy layer near the bottom, your oven ran too cool or you cut into it before it finished setting. Both are common first-time mistakes and both are fixable.
Advance Preparation
- •Starter should be fed 4 to 8 hours before mixing. Plan your feeding schedule backward from when you want to mix the dough.
- •The overnight refrigerator proof option allows you to mix in the evening, shape before bed, and bake the next morning.
- •Baked loaf keeps wrapped at room temperature for 5 days, or frozen for up to 3 months. Slice before freezing for easy single servings.
Frequently Asked Questions
Nutrition Information
1 serving (about 59g)
Where cooking meets culture.
Culinary mentorship, cultural storytelling, and the editorial depth that makes cooking meaningful.
Explore Culinary Advisor