Culinary Advisor
A cooking platform built around craft, culture, and the stories behind what we eat.
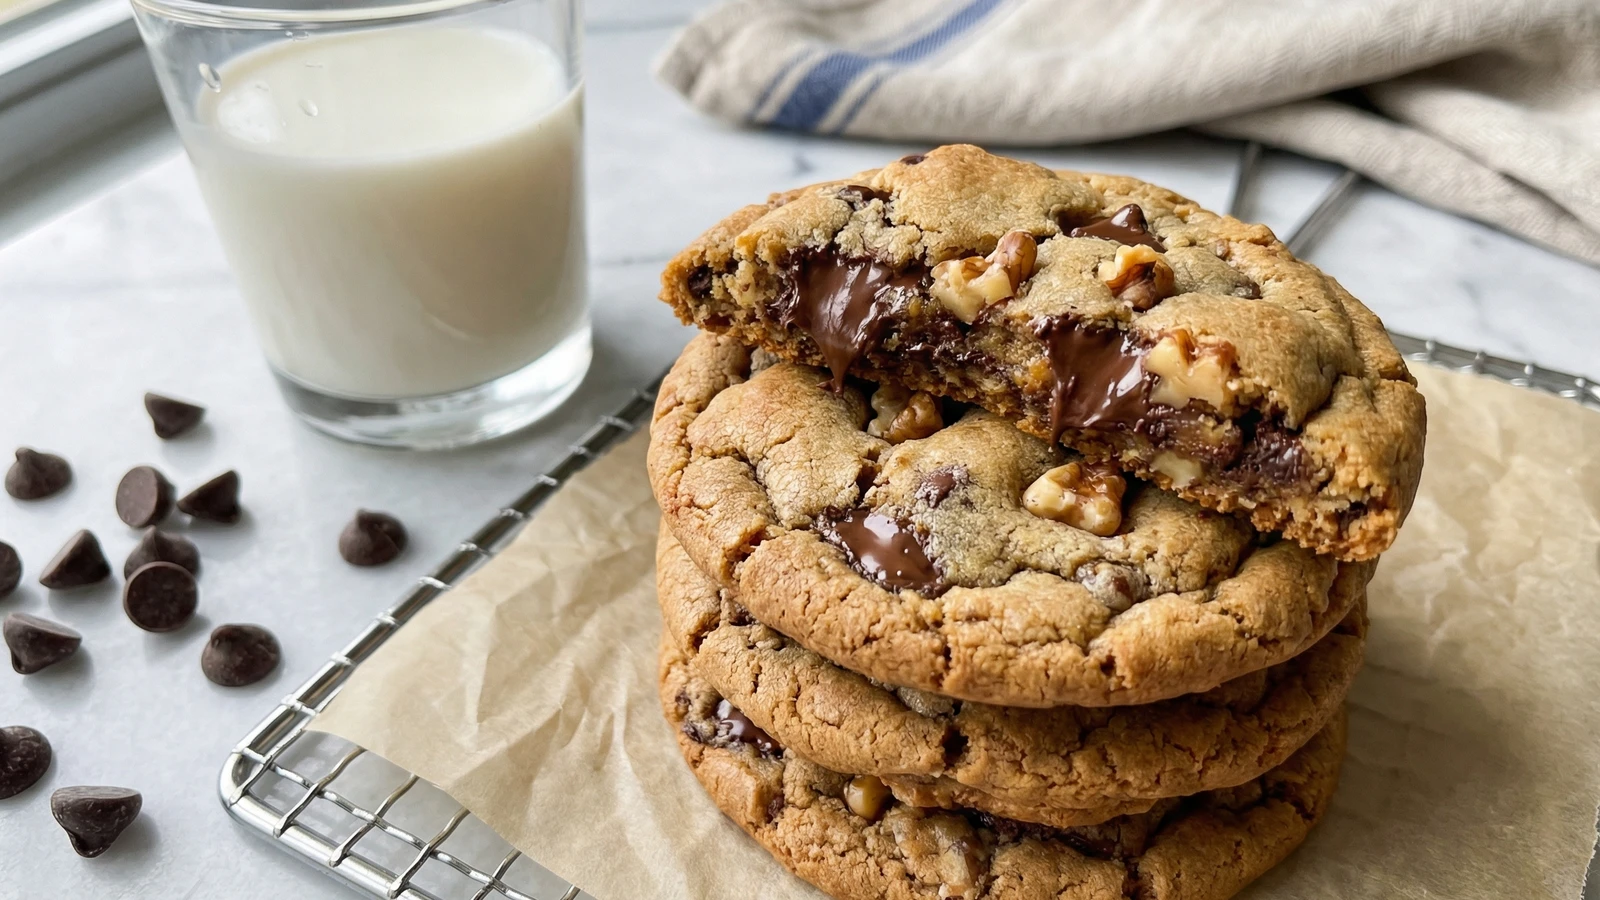
Chocolate Chip Walnut Cookies
Created by
The original Toll House cookie made better with toasted walnuts, delivering crispy caramelized edges that give way to chewy, chocolate-studded centers with satisfying nutty crunch in every bite.
Ruth Wakefield knew exactly what she was doing in 1938. The owner of the Toll House Inn in Whitman, Massachusetts didn't accidentally drop chocolate into her cookie dough, despite what the legend claims. She was a trained dietitian and accomplished baker who deliberately chopped a bar of Nestlé semi-sweet chocolate, expecting it to melt into the batter. When it held its shape instead, creating pockets of molten chocolate throughout a buttery cookie, she had invented America's most beloved dessert.
The addition of walnuts to this foundation is not an afterthought. It's an improvement. Toasted walnuts bring an earthy bitterness that cuts through the sweetness, their oils adding depth to each bite. The texture contrast matters too. Where chocolate chips go soft and gooey, walnuts stay firm, giving your teeth something to work against. This is a more interesting cookie than the plain version, and I'll stand by that.
The technique here rewards patience. Creaming the butter and sugars properly takes a full five minutes. Chilling the dough isn't optional. These steps build structure and concentrate flavor. Rush them and you'll get flat, greasy discs that spread into each other on the pan. Follow them and you'll pull cookies from your oven that rival any bakery's best.
The technique, the tradition, and the story behind every dish.
Discover Culinary AdvisorIngredients
all-purpose flour
Quantity
2 1/4 cups (280g)
baking soda
Quantity
1 teaspoon
fine sea salt
Quantity
1 teaspoon
unsalted butter
Quantity
1 cup (2 sticks, 226g)
softened
granulated sugar
Quantity
3/4 cup (150g)
light brown sugar
Quantity
3/4 cup (165g)
packed
large eggs
Quantity
2
room temperature
pure vanilla extract
Quantity
2 teaspoons
semi-sweet chocolate chips
Quantity
2 cups (340g)
walnut halves
Quantity
1 1/2 cups (170g)
toasted and roughly chopped
| Ingredient | Quantity |
|---|---|
| all-purpose flour | 2 1/4 cups (280g) |
| baking soda | 1 teaspoon |
| fine sea salt | 1 teaspoon |
| unsalted buttersoftened | 1 cup (2 sticks, 226g) |
| granulated sugar | 3/4 cup (150g) |
| light brown sugarpacked | 3/4 cup (165g) |
| large eggsroom temperature | 2 |
| pure vanilla extract | 2 teaspoons |
| semi-sweet chocolate chips | 2 cups (340g) |
| walnut halvestoasted and roughly chopped | 1 1/2 cups (170g) |
Equipment Needed
- •Stand mixer or hand mixer with paddle attachment
- •Rimmed baking sheets
- •Parchment paper
- •2-tablespoon cookie scoop
- •Wire cooling rack
Instructions
- 1
Toast the walnuts
Spread walnut halves in a single layer on a rimmed baking sheet. Toast in a 350°F oven for 8 to 10 minutes, shaking the pan halfway through. You're looking for a golden color and a fragrance that fills your kitchen. The nuts will darken slightly as they cool. Let them cool completely before chopping roughly into irregular pieces. Some should be large enough to bite into, others smaller to distribute throughout the dough.
Watch carefully after the 7-minute mark. Walnuts go from perfectly toasted to burnt in about 90 seconds. Your nose knows before your eyes do. - 2
Combine dry ingredients
Whisk together the flour, baking soda, and salt in a medium bowl. This takes thirty seconds and ensures even distribution of the leavening and salt throughout your cookies. Set aside.
- 3
Cream butter and sugars
In a large bowl or the bowl of a stand mixer fitted with the paddle attachment, beat the softened butter with both sugars on medium speed for a full five minutes. Stop and scrape down the sides twice during this time. The mixture should become noticeably lighter in color and fluffy in texture. This isn't optional. You're incorporating air that will give your cookies lift and structure.
Properly softened butter yields to gentle pressure but holds its shape. If your finger sinks in easily, the butter is too soft. Too cold and it won't cream properly. - 4
Add eggs and vanilla
Add the eggs one at a time, beating well after each addition until fully incorporated. The mixture may look slightly curdled after the first egg. This is normal. Add the vanilla extract with the second egg and beat until the batter is smooth and homogeneous, about 30 seconds more.
- 5
Incorporate dry ingredients
Reduce the mixer speed to low. Add the flour mixture in three additions, mixing just until the flour disappears each time. The moment you can no longer see streaks of white, stop. Overmixing develops gluten and produces tough cookies. Your dough should look thick and slightly sticky.
- 6
Fold in chocolate and walnuts
Remove the bowl from the mixer. Using a sturdy spatula or wooden spoon, fold in the chocolate chips and toasted walnuts by hand. Work from the bottom of the bowl upward, turning the dough to distribute the additions evenly. You want chocolate and nuts in every bite.
- 7
Chill the dough
Cover the bowl tightly with plastic wrap pressed directly against the surface of the dough. Refrigerate for at least 1 hour, or up to 72 hours. Cold dough spreads more slowly in the oven, resulting in thicker cookies with better texture. If you've chilled longer than 2 hours, let the dough sit at room temperature for 10 minutes before scooping.
The 72-hour rest isn't just about convenience. Extended chilling allows the flour to fully hydrate and the sugars to dissolve into the butter, producing cookies with deeper flavor and more complex texture. - 8
Portion the cookies
Preheat your oven to 375°F. Line baking sheets with parchment paper. Using a cookie scoop or two spoons, portion dough into rounds about 2 tablespoons each. Space them 2 inches apart on the prepared sheets. Don't crowd them. These cookies spread.
- 9
Bake to golden perfection
Bake one sheet at a time in the center of the oven for 10 to 12 minutes. The cookies are done when the edges are golden brown and set but the centers still look slightly underdone and puffy. They'll continue cooking on the hot pan. The surface should have a few cracks and the chocolate chips will be glossy but not completely melted.
Every oven runs differently. Start checking at 9 minutes. You're looking for golden edges with pale, soft centers. They'll firm up as they cool. - 10
Cool and serve
Let the cookies rest on the baking sheet for 5 minutes. This allows them to set without becoming hard. Transfer to a wire cooling rack using a thin spatula. The cookies are best eaten within a few hours of baking, while the edges retain their crispness and the centers stay chewy. But let's be honest: they rarely last that long.
Chef Tips
- •Buy walnut halves rather than pieces. Pre-chopped walnuts are often stale or rancid from oxidation. Whole halves stay fresher longer and let you control the size of the pieces in your cookies.
- •Quality chocolate matters. Nestlé invented the chocolate chip specifically for this cookie, but better options exist today. Guittard, Ghirardelli, or any chocolate you'd eat by itself will improve your cookies.
- •For bakery-style cookies with more contrast between crispy edges and gooey centers, increase individual portions to 3 tablespoons and bake at 350°F for 14 to 16 minutes.
- •Store baked cookies in an airtight container at room temperature for up to 5 days. Place a slice of bread in the container to keep them soft. The bread will go stale; the cookies won't.
- •A pinch of flaky sea salt pressed onto each cookie before baking transforms a good cookie into something memorable. The salt amplifies both the chocolate and the toasted walnut flavors.
Advance Preparation
- •Dough can be refrigerated for up to 72 hours before baking. Flavor improves with time.
- •Portioned dough balls freeze beautifully. Arrange on a sheet pan, freeze solid, then transfer to a freezer bag. Bake directly from frozen, adding 2 to 3 minutes to the bake time. Keeps for 3 months.
- •Baked cookies freeze well for up to 2 months. Thaw at room temperature or warm briefly in a 300°F oven to refresh.
Frequently Asked Questions
Nutrition Information
1 serving (about 40g)
Where cooking meets culture.
Culinary mentorship, cultural storytelling, and the editorial depth that makes cooking meaningful.
Explore Culinary Advisor