Culinary Advisor
A cooking platform built around craft, culture, and the stories behind what we eat.
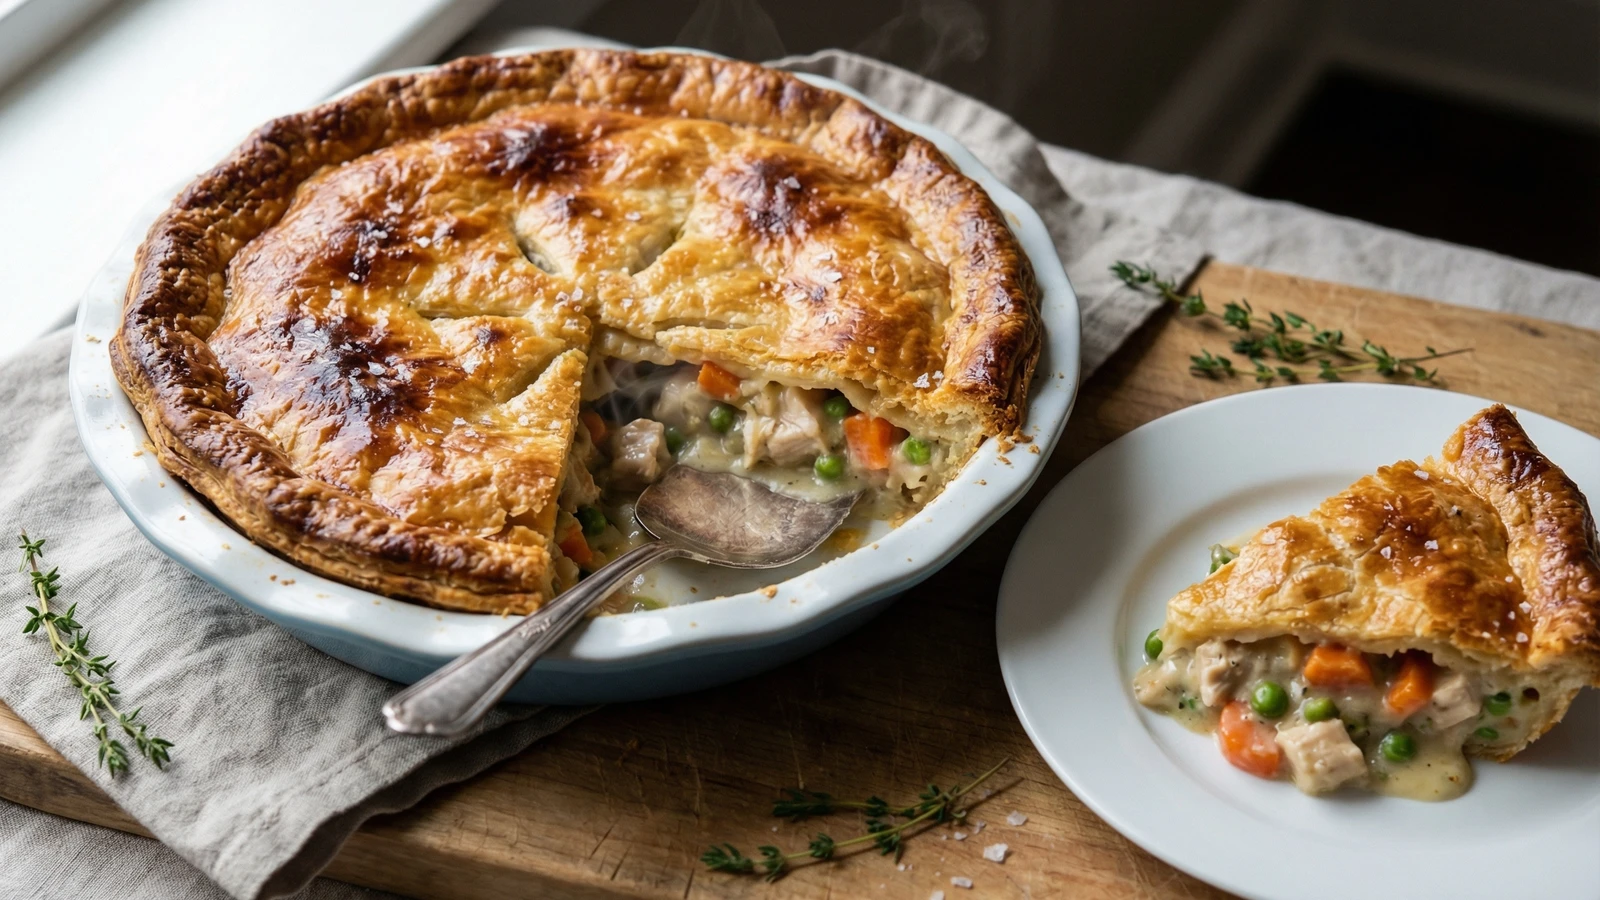
Chicken Pot Pie with Flaky Butter Crust
Created by
A golden dome of shatteringly flaky pastry concealing tender chicken, honest vegetables, and a cream sauce worth every minute of your effort. This is the pot pie that defines American comfort cooking.
The chicken pot pie holds a sacred place in American cookery. English settlers brought their savory pie traditions to these shores, but what emerged from American kitchens became something entirely our own. Thrifty farm cooks stretched Sunday's roast chicken into Tuesday's supper, wrapping the last of the bird in pastry with whatever vegetables the garden offered. The dish required no fancy technique, just good instincts and a willingness to make something from almost nothing.
I've eaten pot pies across this country. Diner versions with puff pastry lids that slide off at the first touch of a fork. Church supper pies with fillings thin as dishwater. Frozen specimens that taste of nothing but salt and regret. None of them compare to a proper homemade pot pie, the kind where the crust shatters into buttery shards and the filling coats your spoon with velvety cream sauce studded with chunks of chicken you can actually identify.
This recipe produces that pot pie. The crust uses cold butter and a light hand to achieve flakiness rivaling any French pâte brisée. The filling balances chicken, vegetables, and cream in proportions that satisfy without overwhelming. You'll taste the thyme. You'll taste the chicken. You'll taste what this dish is supposed to be.
Make this on a Sunday when time stretches before you. Make it ahead for a weeknight when you need something that feels like being taken care of. Make it for people you love. This is food that says something.
The technique, the tradition, and the story behind every dish.
Discover Culinary AdvisorIngredients
all-purpose flour (for crust)
Quantity
2 1/2 cups
fine sea salt (for crust)
Quantity
1 teaspoon
cold unsalted butter (for crust)
Quantity
1 cup (2 sticks)
cut into 1/2-inch cubes
ice water
Quantity
6 to 8 tablespoons
apple cider vinegar
Quantity
1 teaspoon
bone-in, skin-on chicken thighs
Quantity
2 pounds (about 4 thighs)
low-sodium chicken stock
Quantity
4 cups
bay leaf
Quantity
1
unsalted butter (for filling)
Quantity
6 tablespoons
yellow onion
Quantity
1 medium
diced
carrots
Quantity
3 medium
peeled and sliced into 1/4-inch rounds
celery stalks
Quantity
3
sliced 1/4-inch thick
all-purpose flour (for filling)
Quantity
1/2 cup
heavy cream
Quantity
1 cup
frozen peas
Quantity
1 cup
fresh thyme leaves
Quantity
2 tablespoons
fresh parsley
Quantity
2 tablespoons
chopped
kosher salt
Quantity
1 teaspoon, plus more to taste
freshly ground black pepper
Quantity
1/2 teaspoon
egg wash
Quantity
1 large egg
beaten with 1 tablespoon water
| Ingredient | Quantity |
|---|---|
| all-purpose flour (for crust) | 2 1/2 cups |
| fine sea salt (for crust) | 1 teaspoon |
| cold unsalted butter (for crust)cut into 1/2-inch cubes | 1 cup (2 sticks) |
| ice water | 6 to 8 tablespoons |
| apple cider vinegar | 1 teaspoon |
| bone-in, skin-on chicken thighs | 2 pounds (about 4 thighs) |
| low-sodium chicken stock | 4 cups |
| bay leaf | 1 |
| unsalted butter (for filling) | 6 tablespoons |
| yellow oniondiced | 1 medium |
| carrotspeeled and sliced into 1/4-inch rounds | 3 medium |
| celery stalkssliced 1/4-inch thick | 3 |
| all-purpose flour (for filling) | 1/2 cup |
| heavy cream | 1 cup |
| frozen peas | 1 cup |
| fresh thyme leaves | 2 tablespoons |
| fresh parsleychopped | 2 tablespoons |
| kosher salt | 1 teaspoon, plus more to taste |
| freshly ground black pepper | 1/2 teaspoon |
| egg washbeaten with 1 tablespoon water | 1 large egg |
Equipment Needed
- •9-inch deep-dish pie plate or 10-inch cast iron skillet
- •Pastry blender or food processor
- •Rolling pin
- •Rimmed baking sheet
- •Dutch oven or large deep skillet
- •Instant-read thermometer
Instructions
- 1
Make the pie dough
Whisk together the flour and salt in a large bowl. Add the cold butter cubes and work them into the flour using a pastry blender or your fingertips, pressing and smearing until you have a shaggy mixture with butter pieces ranging from pea-sized to flat shards. This variety creates layers. Combine the vinegar with 6 tablespoons of ice water and drizzle over the flour mixture. Stir with a fork until the dough just begins to clump together, adding more water by the tablespoon if needed. The dough should hold when squeezed but not feel wet or sticky.
The vinegar inhibits gluten formation, producing a more tender crust. You won't taste it in the finished pie. - 2
Chill the dough
Turn the dough onto a lightly floured surface and gather it into a rough mound. Divide in half and shape each portion into a flat disk about an inch thick. Wrap tightly in plastic and refrigerate for at least one hour or overnight. Cold dough rolls easily and bakes into distinct flaky layers. Warm dough fights you and produces a tough crust.
- 3
Poach the chicken
Place the chicken thighs in a medium saucepan and cover with the chicken stock. Add the bay leaf. Bring to a gentle simmer over medium heat, then reduce the heat to maintain a lazy bubble. Poach for 25 to 30 minutes until the chicken reaches 165°F at the thickest part. Transfer the thighs to a plate to cool. Strain the poaching liquid through a fine mesh sieve and reserve. You should have about 3 cups. This liquid becomes the foundation of your sauce.
Thighs stay moister than breast meat during the double cooking process. The dark meat also contributes more flavor to the filling. - 4
Shred the chicken
When the chicken is cool enough to handle, remove and discard the skin and bones. Shred the meat into bite-sized pieces using two forks or your fingers. You want generous chunks, not fine threads. Set aside.
- 5
Cook the vegetables
Melt the butter in a large Dutch oven or deep skillet over medium heat. When the foam subsides, add the onion and cook until softened and translucent, about 4 minutes. Add the carrots and celery. Cook, stirring occasionally, until the vegetables begin to soften but still retain some bite, about 6 minutes. The carrots should yield slightly when pressed with a spoon but not be fully tender. They'll continue cooking in the oven.
- 6
Build the sauce
Sprinkle the flour over the vegetables and stir constantly for 2 minutes. This cooks out the raw flour taste. The mixture will look pasty and thick. Gradually pour in 2 1/2 cups of the reserved poaching liquid, whisking constantly to prevent lumps. Add the heavy cream. Bring to a simmer and cook until the sauce thickens enough to coat the back of a spoon, about 5 minutes. The sauce should be the consistency of loose gravy. It will thicken further as it bakes.
If lumps form, don't panic. Whisk vigorously or strain the sauce through a sieve before adding the chicken. - 7
Finish the filling
Remove the pot from heat. Fold in the shredded chicken, frozen peas (no need to thaw), thyme, and parsley. Season with salt and pepper. Taste and adjust. The filling should be well-seasoned now because the crust will mute the flavors slightly. Transfer to a 9-inch deep-dish pie plate or a 10-inch cast iron skillet. The filling should come nearly to the top. Let the filling cool to room temperature before topping with pastry, about 20 minutes.
- 8
Roll the top crust
Remove one disk of dough from the refrigerator. On a lightly floured surface, roll from the center outward, rotating the dough a quarter turn after each pass. Roll to a circle about 12 inches in diameter and 1/8-inch thick. If the dough cracks at the edges, it's too cold. Let it rest for 5 minutes and try again. Drape the dough over your rolling pin and transfer it to cover the filling.
- 9
Seal and vent
Trim the excess dough to leave a 1-inch overhang. Fold the overhang under itself and press against the rim of the dish to seal. Crimp the edges by pressing with the tines of a fork or pinching with your fingers. Cut four slits in the center of the crust to allow steam to escape. These vents prevent the crust from becoming soggy and allow you to peek at the bubbling filling beneath.
- 10
Apply egg wash
Brush the entire surface of the crust with the beaten egg mixture, making sure to get into the crimped edges. This wash produces the deep golden color and subtle sheen that makes a pot pie look like it means business. Place the pie on a rimmed baking sheet to catch any drips.
For extra visual appeal, use the second dough disk to cut decorative shapes (leaves, circles) and arrange them on top before applying the egg wash. - 11
Bake the pie
Position a rack in the lower third of your oven and preheat to 400°F. Bake the pot pie for 40 to 45 minutes, until the crust turns deep golden brown and you can see the filling bubbling through the vents. If the edges brown too quickly, shield them with strips of aluminum foil. The crust should look burnished and confident, not pale and apologetic.
- 12
Rest before serving
Remove the pie from the oven and let it rest for 15 minutes before cutting. This patience is non-negotiable. The filling needs time to set slightly, or it will flood the plate when you serve. Use a sharp knife to cut through the crust, then a large serving spoon to scoop generous portions, making sure everyone gets plenty of crust along with the filling beneath.
Chef Tips
- •A rotisserie chicken makes an excellent shortcut. One bird yields about 3 cups of shredded meat. Use boxed stock in place of poaching liquid and add an extra tablespoon of butter to the sauce for richness.
- •The bottom crust is optional but traditional. For a double-crust pie, roll the second dough disk to line your dish before adding the filling. Blind bake at 375°F for 15 minutes with pie weights before filling to prevent sogginess.
- •Leftover pot pie reheats beautifully. Cover with foil and warm in a 350°F oven for 20 to 25 minutes until heated through. The microwave will destroy your crust. Don't do it.
- •A splash of dry sherry stirred into the sauce just before adding the chicken adds subtle depth. Two tablespoons is enough. More will announce itself too loudly.
Advance Preparation
- •Pie dough can be made up to 3 days ahead and refrigerated, or frozen for up to 2 months. Thaw overnight in the refrigerator before rolling.
- •The filling can be made completely, cooled, and refrigerated for up to 2 days before assembling. Bring to room temperature before topping with pastry, or add 10 minutes to the baking time.
- •The fully assembled unbaked pot pie freezes beautifully. Wrap tightly in plastic, then foil. Freeze for up to 3 months. Bake directly from frozen at 375°F for 60 to 70 minutes, covering with foil if the top browns too quickly.
- •Individual pot pies in ramekins can be assembled and frozen for portioned meals. Adjust baking time to 35 to 40 minutes from frozen.
Frequently Asked Questions
Nutrition Information
1 serving (about 290g)
Where cooking meets culture.
Culinary mentorship, cultural storytelling, and the editorial depth that makes cooking meaningful.
Explore Culinary Advisor