Culinary Advisor
A cooking platform built around craft, culture, and the stories behind what we eat.
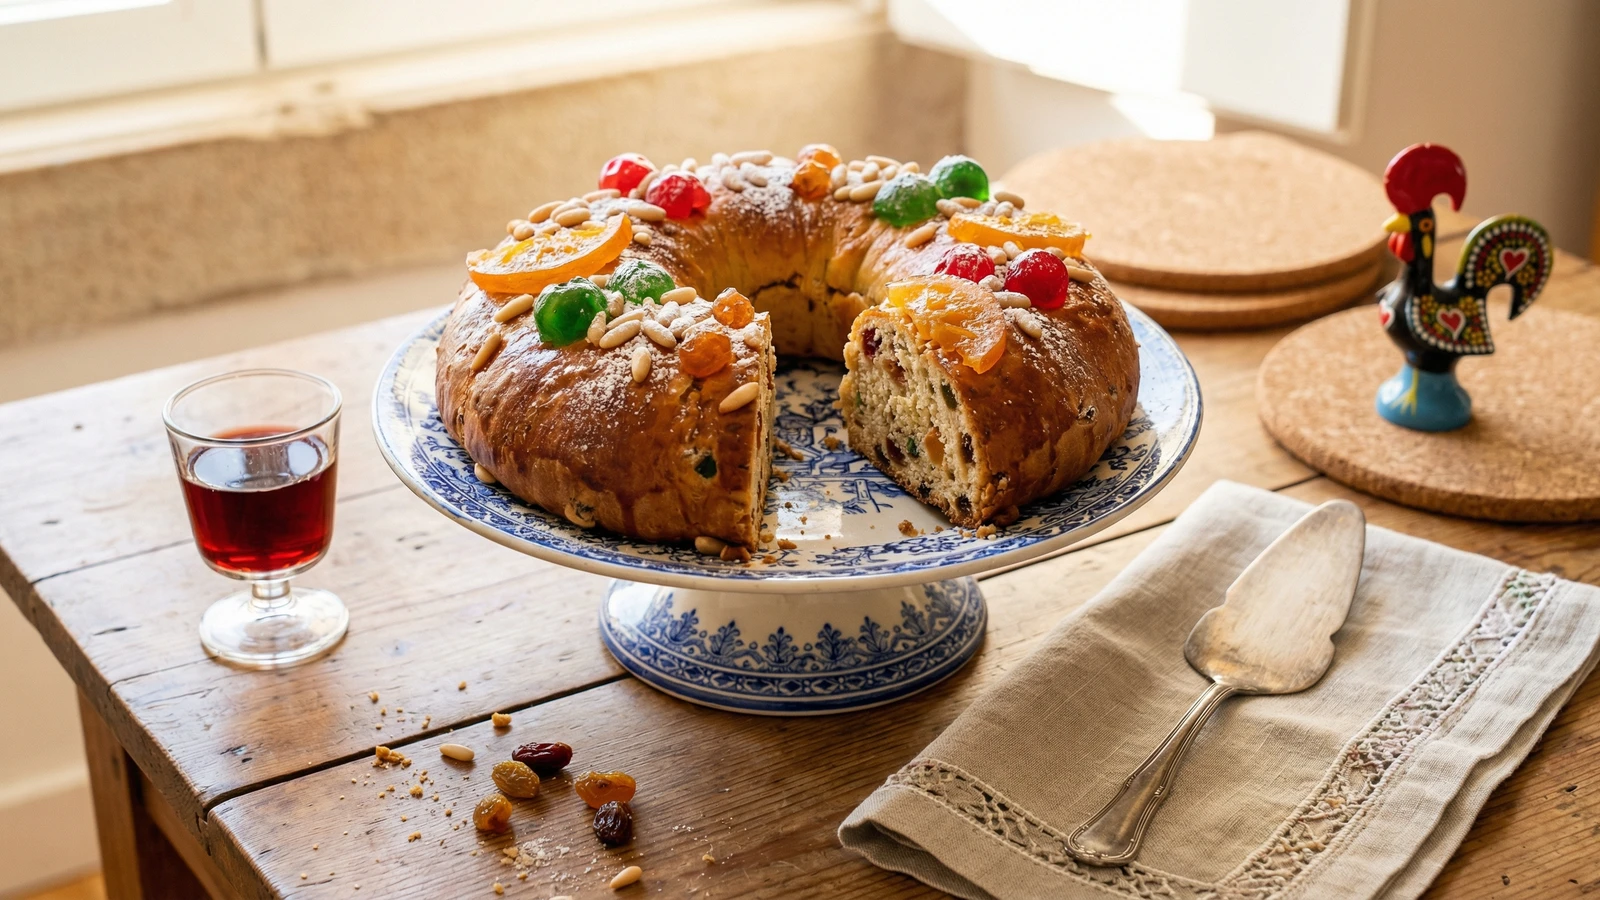
Bolo Rei
Created by
The crown cake of Portuguese Christmas, golden and jeweled with candied fruits, hiding a fava bean for the one who buys next year's. Every bite tastes like December coming home.
December in Portugal smells like Bolo Rei. That sweet, yeasty, port-wine perfume fills every padaria from Lisbon to Porto, and if you close your eyes, you're suddenly six years old again, watching your grandmother unwrap the box from the bakery.
Avó Leonor never made Bolo Rei herself. This was one of the few things she bought, because in her mind, it belonged to the padeiros who had spent their lives perfecting it. But she taught me to appreciate it. The way you slice it at the table on Christmas Eve. The way someone always pretends to be disappointed when they find the fava bean (they're not, everyone knows finding it is lucky, even if it means you buy next year's cake).
I started making my own Bolo Rei three years ago, after the padaria near my grandmother's house in Évora closed. The old baker, Senhor Augusto, gave me his recipe on a stained piece of paper before he retired. His hands shook when he handed it to me. "Keep it alive," he said. So I do.
This is not a quick recipe. The dough needs time to rise, the fruits need to be macerated in port, and you need to shape it with care. But when you pull that golden crown from the oven, decorated with jewels of candied fruit, you'll understand why this cake has crowned Portuguese Christmas tables for over a century. A cozinha é memória. This cake is December itself.
Bolo Rei arrived in Portugal in the late 19th century, likely inspired by the French galette des rois, though the Portuguese transformed it entirely with their enriched yeasted dough and port wine. The tradition of hiding a fava bean (whoever finds it buys next year's cake) and a small gift (now often omitted for safety) dates back to the cake's earliest days. In 2016, Portugal's pasteleiros successfully lobbied to have Bolo Rei recognized as part of the country's intangible cultural heritage.
The technique, the tradition, and the story behind every dish.
Discover Culinary AdvisorIngredients
all-purpose flour
Quantity
500g
plus more for dusting
sugar
Quantity
100g
instant yeast
Quantity
7g
fine salt
Quantity
1 teaspoon
egg yolks
Quantity
4 large
egg
Quantity
1 large
whole milk
Quantity
100ml
lukewarm
port wine
Quantity
75ml
unsalted butter
Quantity
125g
softened
orange zest
Quantity
from 1 orange
lemon zest
Quantity
from 1 lemon
mixed candied fruits
Quantity
150g
chopped (cidra, orange peel, cherries)
raisins
Quantity
75g
pine nuts
Quantity
50g
dried fava bean (optional)
Quantity
1
egg yolk
Quantity
1
beaten with 1 tablespoon milk, for glazing
powdered sugar
Quantity
for dusting
candied fruits and pine nuts
Quantity
for decorating
| Ingredient | Quantity |
|---|---|
| all-purpose flourplus more for dusting | 500g |
| sugar | 100g |
| instant yeast | 7g |
| fine salt | 1 teaspoon |
| egg yolks | 4 large |
| egg | 1 large |
| whole milklukewarm | 100ml |
| port wine | 75ml |
| unsalted buttersoftened | 125g |
| orange zest | from 1 orange |
| lemon zest | from 1 lemon |
| mixed candied fruitschopped (cidra, orange peel, cherries) | 150g |
| raisins | 75g |
| pine nuts | 50g |
| dried fava bean (optional) | 1 |
| egg yolkbeaten with 1 tablespoon milk, for glazing | 1 |
| powdered sugar | for dusting |
| candied fruits and pine nuts | for decorating |
Equipment Needed
- •Stand mixer with dough hook (or strong arms and patience)
- •Large baking sheet
- •Parchment paper
- •Wire cooling rack
- •Pastry brush
Instructions
- 1
Macerate the fruits
The night before (or at least 2 hours ahead), combine the chopped candied fruits and raisins in a bowl with the port wine. Stir well, cover, and let them soak. The fruits will drink the port and become plump and fragrant. This step is not optional. Dry fruits baked into the dough taste like an afterthought. Macerated fruits taste like they belong.
Use proper port wine, not cooking wine. You'll taste it in every bite. Tawny port gives a nuttier flavor; ruby port is fruitier. Both work beautifully. - 2
Make the dough
In a large bowl or the bowl of a stand mixer, combine the flour, sugar, yeast, and salt. Make a well in the center. Add the egg yolks, whole egg, lukewarm milk, and the citrus zests. Mix until a shaggy dough forms. If using a stand mixer with a dough hook, knead on medium-low for about 8 minutes. By hand, turn onto a floured surface and knead for 12 to 15 minutes. The dough should become smooth and slightly tacky but not sticky.
- 3
Add the butter
With the mixer running (or by hand), add the softened butter a tablespoon at a time, waiting until each piece is incorporated before adding the next. This takes patience. The dough will look like a mess halfway through. Keep going. After all the butter is incorporated, knead for another 5 minutes until the dough is silky, elastic, and pulls away from the sides of the bowl cleanly.
The butter must be soft, not melted. Room temperature, pliable like clay. Cold butter won't incorporate properly; melted butter will make the dough greasy. - 4
First rise
Shape the dough into a ball and place it in a lightly oiled bowl. Cover with a clean kitchen towel or plastic wrap. Let it rise in a warm, draft-free spot until doubled in size, about 1.5 to 2 hours. Don't rush this. The dough will tell you when it's ready. Poke it gently with a floured finger. If the indentation springs back slowly, it's time.
- 5
Add the fruits
Drain the macerated fruits, reserving any remaining port (you can brush this on the baked cake later). Gently punch down the risen dough and turn it onto a lightly floured surface. Flatten it into a rough rectangle. Scatter the fruits, pine nuts, and the fava bean (if using) over the surface. Fold the dough over itself and knead gently to distribute the fruits evenly. Don't overwork it. Some fruits will poke through the surface. That's fine. That's character.
If you're including the fava bean, warn your guests before serving. It's tradition, not a dental emergency waiting to happen. - 6
Shape the crown
Roll the dough into a thick rope about 60cm long. Form it into a ring on a parchment-lined baking sheet, pinching the ends together firmly to seal. The hole in the center should be about 10cm wide; it will shrink as the dough rises. This is your crown. Treat it like one.
- 7
Second rise
Cover the shaped ring loosely with oiled plastic wrap or a damp towel. Let it rise until puffy and nearly doubled, about 1 to 1.5 hours. The dough should look pillowy and soft. Meanwhile, preheat your oven to 180°C (350°F).
- 8
Decorate and glaze
Brush the risen dough gently with the egg wash. Don't press down; you don't want to deflate your careful work. Arrange candied fruit pieces and pine nuts on top in a decorative pattern. Press them in gently so they'll stay put during baking. Traditional Bolo Rei looks abundant, almost gaudy. Don't be shy.
- 9
Bake
Bake for 30 to 35 minutes, until the top is deeply golden and a skewer inserted into the thickest part comes out clean. If the top browns too quickly, tent loosely with foil for the last 10 minutes. The kitchen will smell like Christmas. Let the cake cool on the baking sheet for 10 minutes, then transfer to a wire rack.
- 10
Finish and serve
While still slightly warm, brush with any reserved port if you like (this adds shine and another layer of flavor). Let cool completely. Just before serving, dust generously with powdered sugar. The white against the golden crust and jeweled fruits is part of the beauty. Slice at the table. Watch who gets the fava.
Chef Tips
- •Start this recipe the day before you want to serve it. The fruit maceration overnight makes a real difference, and the dough benefits from unhurried rising.
- •Portuguese cidra (candied citron) is the traditional star of the candied fruits. If you can't find it, use a mix of candied orange peel, lemon peel, and cherries. Avoid the neon-colored candied fruit sold in supermarkets; it tastes like sugar and regret.
- •The fava bean tradition is lovely but practical: whoever finds it must buy or make next year's Bolo Rei. In the past, a small ceramic or metal figurine was also hidden inside as a lucky charm. Food safety regulations ended that in many bakeries, but at home, the choice is yours.
- •Bolo Rei keeps well wrapped at room temperature for up to 5 days. It actually improves on the second day as the flavors meld. Some families toast slices lightly and serve with butter.
Advance Preparation
- •Macerate the fruits in port wine overnight or for at least 2 hours before starting the dough.
- •The shaped, unbaked ring can be refrigerated overnight for a slow second rise. Remove from the fridge 1 hour before baking to come to room temperature.
- •Baked Bolo Rei keeps well at room temperature, wrapped tightly, for up to 5 days. Do not refrigerate; it will dry out.
Frequently Asked Questions
Nutrition Information
1 serving (about 85g)
Where cooking meets culture.
Culinary mentorship, cultural storytelling, and the editorial depth that makes cooking meaningful.
Explore Culinary Advisor