Culinary Advisor
A cooking platform built around craft, culture, and the stories behind what we eat.
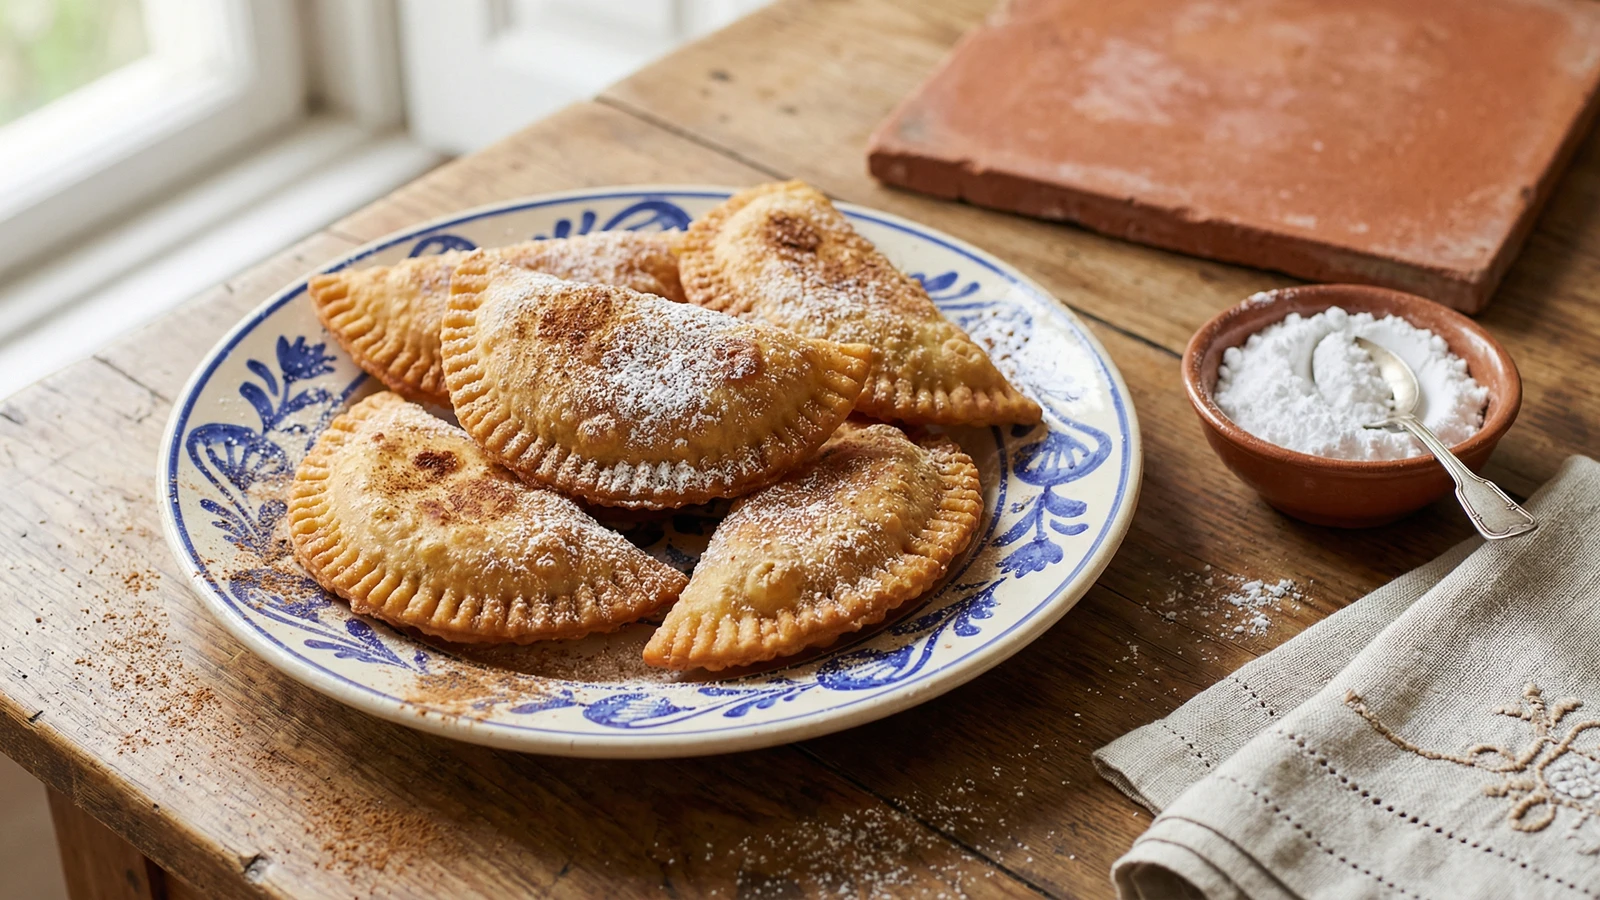
Azevias de Grão
Created by
The Christmas turnovers of Alentejo, where humble chickpeas become something miraculous inside a crispy shell. Proof that Portuguese grandmothers could turn anything into celebration.
The first time I tell people the filling is chickpeas, they look at me like I've lost my mind. Chickpeas? In a sweet pastry? For Christmas?
Yes. And it works. It more than works. It's one of those dishes that proves Portuguese cooking has always understood something the rest of the world is just discovering: legumes belong everywhere, including dessert.
Avó Leonor made azevias every December. She'd cook the grão until it was soft enough to mash with a fork, then mix it with ground almonds, sugar, and enough cinnamon to perfume the whole house. The filling sat overnight so the flavors could marry. "Tem de descansar," she'd say. It needs to rest. Everything good in the kitchen needs time.
The dough is simple: flour, a little fat, warm water, maybe a splash of aguardente for luck. Roll it thin, cut circles, fill them, fold into half-moons, seal with a fork, and fry until golden. The outside shatters. The inside is dense and sweet and unlike anything else. At Mesa da Avó, I serve these at our Christmas dinners and watch people's faces change from skepticism to wonder. That moment never gets old.
These are peasant sweets. Convent sweets used eggs by the dozen because the nuns had them. Rural families had what they grew: chickpeas, almonds from the tree in the yard, lard from the pig. They made magic from almost nothing. That's the story of Portuguese cooking. That's who we are.
Azevias de grão trace their origins to the rural Alentejo, where chickpeas were a dietary staple and nothing was wasted. The tradition of sweet chickpea fillings may have Moorish roots, reflecting the centuries of cultural exchange in southern Portugal. These pastries were traditionally made only at Christmas, when families gathered and special sweets marked the celebration.
The technique, the tradition, and the story behind every dish.
Discover Culinary AdvisorIngredients
dried chickpeas
Quantity
250g
soaked overnight and cooked until very soft
ground almonds
Quantity
150g
granulated sugar
Quantity
200g
ground cinnamon
Quantity
1 teaspoon, plus more for dusting
lemon
Quantity
1
zested
all-purpose flour
Quantity
400g
lard or vegetable shortening
Quantity
50g
at room temperature
olive oil
Quantity
2 tablespoons
warm water
Quantity
150ml
aguardente or brandy (optional)
Quantity
2 tablespoons
fine salt
Quantity
1/2 teaspoon
vegetable oil
Quantity
for frying
powdered sugar
Quantity
for dusting
| Ingredient | Quantity |
|---|---|
| dried chickpeassoaked overnight and cooked until very soft | 250g |
| ground almonds | 150g |
| granulated sugar | 200g |
| ground cinnamon | 1 teaspoon, plus more for dusting |
| lemonzested | 1 |
| all-purpose flour | 400g |
| lard or vegetable shorteningat room temperature | 50g |
| olive oil | 2 tablespoons |
| warm water | 150ml |
| aguardente or brandy (optional) | 2 tablespoons |
| fine salt | 1/2 teaspoon |
| vegetable oil | for frying |
| powdered sugar | for dusting |
Equipment Needed
- •Food mill or sturdy fork for mashing chickpeas
- •Rolling pin
- •8-10cm round cutter or glass
- •Fork for crimping edges
- •Deep heavy pot for frying
- •Kitchen thermometer
- •Slotted spoon or spider
Instructions
- 1
Make the filling
Drain the cooked chickpeas well. They should be very soft, almost falling apart. While still warm, mash them thoroughly with a fork or pass through a food mill. You want a smooth paste, not chunky. Add the ground almonds, sugar, cinnamon, and lemon zest. Mix until everything is combined into a thick, slightly sticky paste. Taste it. The filling should be sweet, fragrant with cinnamon, and taste unmistakably of chickpeas. That's not a flaw. That's the point.
If using canned chickpeas, drain and rinse them well, then warm them in a dry pan for a few minutes to remove excess moisture before mashing. - 2
Rest the filling
Cover the filling and let it rest for at least 2 hours, or overnight in the refrigerator. This lets the almonds absorb moisture and the flavors deepen. Avó Leonor always made the filling the day before. She was right. It tastes better with time.
- 3
Make the dough
Mound the flour on a clean surface or in a large bowl. Add the salt. Make a well in the center. Add the lard, olive oil, aguardente if using, and most of the warm water. Use your hands to bring everything together, adding more water if needed. Knead for 5 minutes until smooth and pliable. The dough should be soft but not sticky. If it clings to your hands, add a little more flour. Wrap in plastic and let rest for 30 minutes.
The aguardente isn't just for flavor. The alcohol evaporates during frying and helps create a crispier crust. But if you don't have it, the azevias will still be delicious. - 4
Shape the azevias
Roll the dough thin, about 2mm. Cut circles using an 8-10cm cutter or a glass. Place a heaping tablespoon of filling in the center of each circle. Don't overfill. You need room to seal. Fold the dough over to form a half-moon and press the edges firmly together. Use a fork to crimp the sealed edge, pressing down firmly. This seals the pastry and creates the traditional pattern. Place finished azevias on a floured tray.
- 5
Fry until golden
Pour oil into a deep pan or pot to a depth of at least 5cm. Heat to 170°C (340°F). Test with a small piece of dough: it should sizzle immediately and rise to the surface. Fry the azevias in batches of 3 or 4, turning once, until golden brown on both sides, about 2 to 3 minutes total. Don't crowd the pan. The temperature will drop and the pastries will absorb oil instead of crisping.
Fry at a moderate temperature. Too hot and the outside burns before the dough cooks through. Too cool and they turn greasy. 170°C is the sweet spot. - 6
Finish and serve
Transfer the fried azevias to paper towels to drain. While still slightly warm, dust generously with powdered sugar and a light shake of cinnamon. Let them cool completely before serving. The outside should shatter when you bite in. The filling inside should be dense, sweet, and surprising. This is what Christmas tastes like in Alentejo.
Chef Tips
- •The chickpeas must be very well cooked, almost mushy. Undercooked chickpeas won't mash properly and the filling will be grainy. If cooking from dried, err on the side of overcooking.
- •Traditional recipes use lard for both the dough and for frying. It gives the best flavor and crispest texture. If that's not for you, vegetable shortening and oil work fine. What you lose in authenticity, you keep in principle.
- •These keep well in an airtight container for up to a week. The filling actually improves. If the exterior loses its crispness, a few minutes in a warm oven brings it back.
- •Some families add a splash of orange blossom water to the filling. Others add grated chocolate. Avó Leonor would have called this showing off, but I've tried both and I understand the temptation.
Advance Preparation
- •The filling should be made at least 2 hours ahead, ideally overnight. It improves with resting.
- •The dough can be made up to a day ahead and refrigerated. Bring to room temperature before rolling.
- •Shaped, unfried azevias can be frozen on a tray, then stored in freezer bags for up to 2 months. Fry directly from frozen, adding a minute to the cooking time.
Frequently Asked Questions
Nutrition Information
1 serving (about 68g)
Where cooking meets culture.
Culinary mentorship, cultural storytelling, and the editorial depth that makes cooking meaningful.
Explore Culinary Advisor